Category Archives: Recipes

These recipes all follow my personal diet: no gluten, wheat, dairy, casein, eggs, walnuts, almonds, pecans, bananas, or avocados. Even though many of these foods are in fact healthy for you for various reasons I have to avoid them, so all recipes included will follow these restrictions. The best part is that I’ve tasted them all and will only post recipes that taste great, so enjoy!

White Chicken Chili

White Chicken Chili

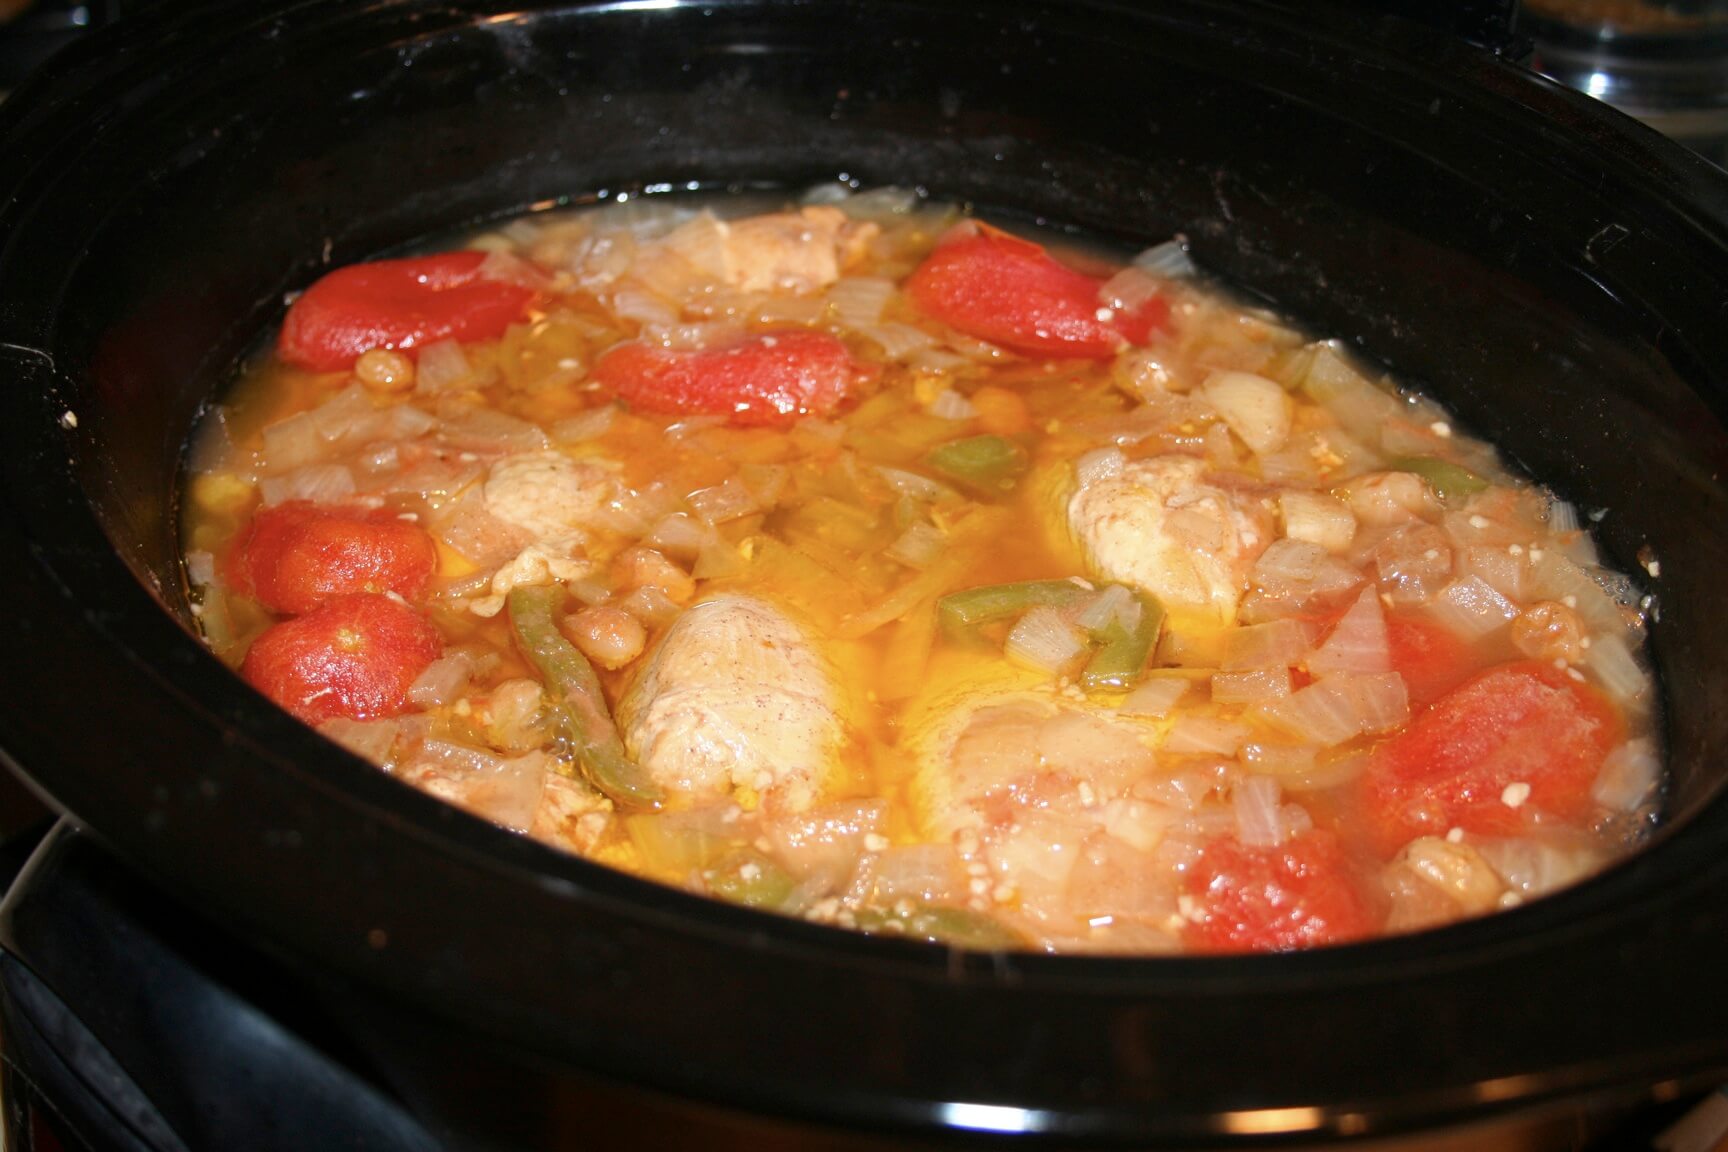
There’s nothing more comforting, as far as food goes, than a big bowl of chili on a cool day after a hard days’ work. And this White Chicken Chili is a wonderful more “Springy” version of your red winter chili with ground beef. This one is a little lighter and is perfect for these Spring days when the evenings are still chilly. It uses fresh ingredients that keep it light, yet full of flavor.

This recipe serves 6 people, is relatively quick to make (about 30 minutes), and makes great left-overs.

Ingredients:
1 medium onion, chopped
1 jalapeno, seeded and chopped
2 garlic cloves, minced
1 tablespoon vegetable oil
4 cups chicken broth
2 cans (15 1/2 oz. each) Great Northern Beans, rinsed and drained
2 tablespoons minced parsley
1 tablespoon lime juice
1 teaspoon lime juice
1 teaspoon ground cumin
2 tablespoons cornstarch
1/4 cup cold water
2 cups cubed chicken cooked

Directions:
1. In a large saucepan saute the cubed chicken with a little oil, salt and pepper. Remove chicken when cooked and set aside.
2. In the same saucepan cook onion, jalapeno and garlic in oil until tender.
3. Stir in broth, beans, parsley, lime juice and cumin; bring to a boil. Reduce heat; cover and simmer for 10 minutes, stirring occasionally.
4. Combine cornstarch and water until smooth; stir into chili. Add chicken. Bring to a boil; cook and stir for 2 minutes or until thickened. Serve and Enjoy!

This White Chicken Chili is great served with gluten free bread toasted with butter of gluten free cornbread with melted butter. You might also try this one with fresh cilantro rather than the parsley.

*Recipe source: Indianapolis Star, Joanie Fuson adapted from Taste of Home’s Big Book of Soup, Reiman Media Group

Quinoa, Mango, and Black Bean Salad

Quinoa, Mango, and Black Bean Salad

I’m always looking for dishes to make for lunch that are quick and easy to eat on the go. I have to say turkey sandwiches just don’t call my name at lunch time anymore. This Quinoa Salad is packed with so many flavors that blend together into this delicious lunch medley.

Need a meal that gives you a break from meat? Packed with protein and fiber? Full of flavor? That doesn’t have to be heated when you’re ready to eat it?

If you said yes, then this Quinoa Salad is for you! Just make it the night before and pack individual serving sizes into containers in your fridge and grab it as you head off to work in the morning. Store in the fridge and enjoy for lunch!

Ingredients:
1/2 cup quinoa
1 cup water
1/4 cup orange juice
1/4 cup chopped cilantro
2 tablespoons rice vinegar
2 teaspoons toasted sesame oil
1 teaspoon minced fresh ginger
1/8 teaspoon salt
Pinch cayenne pepper
1 small mango, diced
1 small red bell pepper, diced
1 cup canned black beans, rinsed
2 scallions, thinly sliced

Directions:
1. Toast quinoa in small dry saucepan over medium heat, stirring often, until it crackles and becomes aromatic, 4 to 6 minutes. Careful not to burn.
2. Transfer to fine sieve and rinse thoroughly. Return quinoa to the pot and add water.
3. Bring to a simmer and reduce heat to maintain a simmer. Cook until quinoa is tender and the liquid has been all absorbed, 15 to 20 minutes.

4. Whisk orange juice, cilantro, vinegar, oil, ginger, salt, salt and cayenne in medium bowl.

5. Add mango, bell pepper, beans, scallions; toss to coat.
6. When quinoa is finished cooking, add mango mixture and toss to coat. Cover and refrigerate. Serve chilled and Enjoy!

*Makes 2 servings, approximately 2 cups each
* Recipe Source: www.eatingwell.com

* Per serving: 422 Calories, 9 g total fat, 15 g protein, 74 g carbohydrates, 0 g cholesterol, 19 g fiber

Frozen Coconut Macaroon Bonbons

Frozen Coconut Macaroon Bonbons

With Good Friday today and Easter approaching this weekend, it’s really such a wonderful weekend of reverence and celebration that our Lord and Savior, Jesus Christ, died and rose again for our salvation! What a wonderful celebration!

I’m always looking for desserts that are extra special to make for such celebrations as important holidays and birthdays. A treat that really wows and says “Now this is a celebration!” Even those of us with restricted diets love a decadent dessert to celebrate special events. Restricted diet or not, these Frozen Coconut Macaroon Bonbons are a mouth watering dessert to have at your Easter dinner this weekend or at a birthday bash! If you gave up sweets for Lent this year, what a better way to end your sweet fast than with these delicious little treats?

I actually made these Bonbons for my birthday last fall and lost the recipe…sad day! To my wonderful surprise I received a card from my Mom yesterday with a copy of the recipe I had made for her inside! So, thanks to my Mom for saving the recipe!

Ingredients:
2 2/3 cups (one 7 oz. bag) sweetened, flaked coconut
1/4 cup well-shaken, unsweetened coconut milk (not light)
2 tablespoons organic, refined coconut oil (get it in your health food section of your grocery or at Whole Foods)(try to liquify the oil before measuring)
1 tablespoon agave syrup
1/2 teaspoon vanilla extract
1/4 teaspoon salt
1/4 cup gluten free, dairy free semisweet chocolate chips, melted and cooled

Directions:
1. Line baking sheet with parchment paper.
2. In a large mixing bowl, stir together coconut, coconut milk, oil, agave syrup, vanilla and salt.
3. Drop by tablespoons onto prepared baking sheet, then roll into balls, and freeze for at least 1 hour.
4. Remove bonbons from freezer and dip bottoms into cooled, melted chocolate. Return bonbons to the freezer for at least 20 minutes and remove them from the freezer 15 minutes before ready to serve. Enjoy!
5. Store completely hardened bonbons in an air tight container and keep frozen for up to 2 weeks.

*Recipe Source: Allergy-Free Desserts by Elizabeth Gordon, 2010
*25 minutes prep time plus freeze time
*Makes 16 bonbons
*Per serving: 97 Calories, 2 g Protein, 8 g Carbs, 1 g Fiber, 7 g Total Fat, 41 mg sodium

Moroccan-Style Stewed Chicken

Moroccan-Style Stewed Chicken

Well, the weather where I live decided to resort back to winter for a few days. So, I thought this warm stew would be an appropriate recipe to share today. I tried this recipe for the first time last week and both Matt and I really enjoyed it. It only took me a total of 20 minutes to prepare and then cooked in my slow cooker for a while and voila!..a warm, healthy meal that was ready when we were ready to eat it.

The Moroccan style dishes that I’ve had seem to combine savory and sweet flavors to create a whole new flavor. This one is really great for people with restricted diets, as the ingredients are very basic and it’s really light on your stomach. It also makes really great left-overs, so start cookin’!

Ingredients:
4 cups gluten free chicken broth
3 cloves garlic
2 tablespoons honey
2 teaspoons cumin
1/2 teaspoon cinnamon
1 (14.5 oz. can) diced tomatoes (I had whole can tomatoes, so that’s what I used)
1 large green pepper, cut into 2 inch strips
1 large onion, chopped
1/2 cup raisins
8 (2 oz.) boneless, skinless chicken thighs
Hot cooked quinoa, rice, or orzo (whatever you like to serve with it)

Directions:
1. Stir in stock, honey, cumin, cinnamon, tomatoes, green pepper, onion, and raisins in to your slow cooker. Add chicken and turn to coat.
2. Cover and cook on low for 7 to 8 hours or on high for 4 to 5 hours or until chicken is cooked through. Salt and pepper to taste if you like.

3. In serving bowls lay a layer of cumin, rice, or orzo and then dish the stew on top of it. Enjoy!

Easy Spiced Lentil Spring Soup

Easy Spiced Lentil Spring Soup

This recipe is simple to make, can be made in a slow cooker, and includes 2 types of meat, 2 types of legumes, and plenty of Spring veggies (spinach, parsley, and onions).

I’m all about healthy homemade meals, but I have to say, the recipes I make again and again are those that are not only healthy and satisfy my taste buds, but those that are quick and easy to make. From all the recipes I post it may look like all I do is cook, but I generally prefer recipes that are low maintenance (those that I can let cook in my slow cooker are the best).

This Spiced Lentil Soup serves 10 people, so if you want less serving portions decrease all the amounts by half, or have left-overs and freeze portions. The creator of this recipe said that her kids loved this one too.

Ingredients:
1/2 pound gluten free Italian sausage (casings removed, crumbled)
1/2 cup diced onion
1/3 cup brown rice (uncooked)
3 garlic cloves, minced
3 quarts gluten free chicken stock
1 cup lentils (uncooked)
1 chicken breast (uncooked)
1/2 cup fresh parsley, chopped
1 can (15 oz.) garbanzo beans
1/2 to 1 pound fresh or frozen spinach
1 jar (12 oz.) salsa, mild or medium

Directions:
1. Brown sausage, onion, rice, and garlic in a skillet. Transfer to the slow cooker or large stock pot (whatever you want to cook the soup in).
2. Add the chicken stock, lentils, chicken breast and parsley. (I added a little less stock, as my slow cooker got a little too full). Simmer for as long as you desire or until lentils are tender. (I simmered mine on high in my slow cooker for a few hours while I ran errands).
3. Stir soup breaking chicken apart. Add beans, spinach, and salsa and heat through. (I cooked it on high for about another 1/2 hour). Enjoy!

*Recipe Source: The Country Cooking Recipe Collection: Prize-Winning Soups & Sandwhiches, (1993 publication) recipe submitted by Marty Rummel, Trout Lake, Washington

Nacho Appetizer Tray

Nacho Appetizer Tray

Like I’ve said before, one of the toughest food scenarios I face with my restricted diet is appetizers and finger foods.
What to eat or bring to get-togethers and parties that doesn’t have dairy, eggs, gluten, or any of my other random no no foods. All the frozen appetizers you can buy and heat up in the oven are breaded, fried and have cheese. Most dips have cream or cheese. Dessert? Forget it if its not homemade with specialty flours and egg replacers.

So what’s a quick appetizer you can throw together last minute that will be a hit?

Try a Nacho Appetizer Tray! I got this idea when I was walking through the grocery store looking for something to make last minute for a get-together. I saw this pre-made layered nacho dip (layered refried beans, sour cream, cheese, salsa, tomatoes, olives and green onions). A small tray of this dip ran about $16. Expensive for what it was if you ask me.

I couldn’t eat this dip tray because it had cheese and sour cream mixed in with it.
So, I thought why not serve a disassembled version of this?

I decided to serve the chips and salsa in a typical chip and dip tray and then served the remaining toppings in small glass bowls on glass trays. I put a spoon in each and set out small plates so everyone could pick and choose their own nacho toppings. It turned out to be very inexpensive, easy to do, and had a lot less preservatives than the pre-made tray. The only real prep work included taking the salsa, beans, cheese and chips out of their containers and into the serving trays. I cut up the green onions, olives and tomatoes and put them in their serving trays. Voila!

Here’s a list of what I included in my Nacho Appetizer Tray, but you can pick and choose what you want to include in yours.

Corn chips
Salsa
Diced tomatoes
Sliced green onions
Refried beans
Sliced black olives
Shredded cheese

Other toppings you could include:
Sour cream
Fresh cilantro
Melted nacho cheese
Pico de gallo
Black beans
Seasoned ground beef or turkey

I hope this gives you another option of something to served for your next party!
With the left overs I made a meal of taco salads, which turned out really tasty. Enjoy your next party even on a restricted diet!

Raspberry Cornmeal Crisp

Raspberry Cornmeal Crisp

I thought I’d wrap up the week with a sweet treat that’s sure to satisfy your sweet tooth! I have to admit that my general consensus on sweets is that if its not chocolate don’t bother. But this one is quite tasty even without chocolate.

This Raspberry Cornmeal Crisp uses Spring fruit, but admittedly I wouldn’t consider it healthy…you’ll see what I mean when you see the amounts of sugar and butter. I’m not an advocate for eating an healthy diet, but a little sweet can curb your cravings and keep you from binging. My advice with sweets: Don’t waste the calories and sugar on processed sweets…if you’re going to eat sweets make them the really good homemade ones!

This is another Everyday Food: A Martha Stewart Magazine, April 2011 Issue recipe. I adapted Martha’s recipe to fit my restricted diet and it came out really well. Martha says to cool the crisp and cut it into bars, but yeah right…let it cool after it comes out of the oven hot and gooey? I don’t think so. We served it warm and when warm it reminds me of a crisp. When its served cold it reminds me of shortbread with fruit. So, try it either way you like.

Ingredients:
1/2 cup cornmeal
2 cups gluten free all-purpose flour (spooned and leveled)(I used Bob’s Redmill Brand)
3/4 cup sugar
1/2 teaspoon coarse salt
1 cup (2 sticks) unsalted butter, melted
10 ounces frozen raspberries

Directions:
1. Preheat oven to 350 degrees. Line an 8 inch square baking dish with parchment paper, leaving a 1 inch overhang on 2 sides.
2. In a large bowl, mix together cornmeal, four, sugar, and salt.
3. Add butter and stir or mix with your hands until ingredients are evenly moistened.
4. Press about 2/3 dough into the bottom of the dish.

5. Scatter raspberries over the top and crumble remaining dough over the raspberries.

6. Bake until top is golden brown, 35 to 40 minutes. Let cool and cut into bars or spoon hot into dishes. Eat and Enjoy!

Buttery Shrimp & Radish Pasta

Buttery Shrimp & Radish Pasta

As promised here is one of my new favorite recipes that uses radishes. Its a delicious flavor combination that swirls together the flavors from the buttery shrimp, the spicy radishes, and a touch of garlic to create this dish. This pasta dish really hit the spot for me. I love pasta dishes but can only eat it when I make it, as gluten free and dairy free recipes in restaurants is still a challenge. So this one is a nice change to my staple pasta with pasta sauce.

This recipe is a great choice for someone who isn’t sure if they like radishes or not, as cooking them mellows out their flavor a bit.

Ingredients:
Coarse salt and ground pepper to taste
3/4 pound Gluten Free linguine or other long pasta
1/4 cup unsalted butter (if you can’t eat butter you could use margarine or just olive oil)
2 cloves minced garlic
1 large bunch radishes, thinly sliced (I used a mandalin) with greens rinsed well and roughly chopped
1/2 red onion, sliced
1 pound frozen large shrimp, peeled, deveined, and thawed

Directions:
1. Cook pasta in a large pot of boiling salt water; drain and set aside, reserving 1 cup of pasta water. Add 2 tablespoons butter to the pasta and toss until it melts; keep pasta warm.


2. Meanwhile in a large skillet melt 1 tablespoon butter over medium high heat. Add garlic, onions and radishes and cook, stirring occasionally until radishes are crisp-tender, 3 minutes.
3. Add radish greens and cook until wilted, seasoning with salt and pepper. Then add to pasta and stir to combine.


4. In the same skillet you used to cook the veggies, melt 1 tablespoon butter. Add the shrimp, seasoning with salt and pepper. Cook, stirring occasionally, until the shrimp are opaque throughout, about 4 minutes. (They will curl up and turn a slightly orange color when cooked through).
5. Add shrimp to pasta and toss, adding enough pasta water to create a light sauce that coats pasta. Serve and enjoy!

I suggest to make this recipe make sure to cut up all the veggies first and to peel, devein and thaw the shrimp before you begin cooking. I added onion to the original recipe to add extra flavor.

*Recipe serves 4 people
*Recipe source Everyday Food: A Martha Stewart Magazine, April 2011 Issue

Closer Look: Radishes

Closer Look: Radishes

Today I’m taking a Closer Look at radishes. If you’re like me, you’ve seen others eat them, tried them once or twice in the past and didn’t like them. My grandpa used to grow them and my husband has grown them and I just always thought that I didn’t like them, so I didn’t eat them.

So, why am I taking a Closer Look at radishes today? I was at my friend Mary’s house for a party a couple months ago and she had radishes on an appetizer tray. I tried them and actually really liked them! Who knew? It hadn’t been that long before that I tried them and didn’t like them. But for what ever reason I do now and I’m really glad. So here’s a Closer Look at these little red roots and why you should give ‘em a try again!

What are radishes?
Radishes are a member of the cruciferous family, which means they’re related to broccoli, brussel sprouts, and cauliflower. There are several different varieties of radishes. They vary in color from red to purple to black to white. They can be very small or rather large. You can not only consume the root, but the greens as well. The mustard oil found in the vegetable gives it its tangy flavor.

How to select the best radishes?
Look for radishes that have brightly colored roots that are firm and have crisp greens.

What are the nutritional benefits of eating radishes?
These little guys are packed full of the good stuff. They are high in the cancer fighting antioxidant vitamin C and the greens have even more than the roots. Radishes are a great source of folic acid, calcium, iron, potassium, and thiamine. They are a great source of fiber and have been traditionally used to relieve constipation and assist with weight loss. They’re low in carbs and help to keep the liver and kidneys functioning properly.

What are some various ways to use prepare radishes?
You can eat radishes and their greens raw. They make a nice addition to salads and veggie appetizer trays. I like to eat them raw with hummus. You can saute them and include them in a variety of dishes. Add them into anything you want to add a little zing to, including pasta dishes and vegetable sautes.

Stay tuned this week for one of my new favorite pasta dishes using radishes.

I hope you’ll give radishes a first or maybe a second try. You never know, they could become a new favorite for you!

*Source: www.brighthub.com/health/diet-nutrition/articles/42219.aspx

Sauted Mushroom Side Dish

Sauted Mushroom Side Dish

Mushrooms are tasty cooked into various sauces, soups, and pasta dishes. But I’ve found their a really great side dish to grilled meats and especially steaks. This recipe is much like a recipe your grandma would give you, not really exact measurements but a little of this and a little of that. Its very simple and very tasty!

Ingredients:
Sliced mushrooms
Minced garlic
Lemon (for juice)
Butter
Sherry cooking wine

Directions:
1. Heat some butter over medium heat in a saute pan. Add the sliced mushrooms to the saute pan and cook until they start to soften.
2. Add some more butter as you cook the mushrooms. Add a spoon full of minced garlic and a squeeze of lemon juice.
3. Continue cooking until the mushrooms are cooked through and right before you remove from the heat add a little cooking sherry. Enjoy!