Category Archives: Health Tips

Closer Look: Apricots

Closer Look: Apricots

One thing I love about summer is the vast amount of fresh, ripe fruit. This time of year I get excited to go to the supermarket or farmer’s market because I know that an array of tasty jewels awaits me. And today I’m taking a Closer Look at just one of these ripe beauties: Apricots.

I remember my first encounter with Apricots. I was about 4 years old and my family and I were visiting my grandparents in McAllen, Texas. They had an Apricot tree in their yard and my grandmother, Nanny, baked Apricot pies. I remember thinking, “these are kind of like peaches, but look and taste a little different.” That’s where my intrigue with this fruit started.

Then for years I never saw Apricots other than dried ones, which I really enjoy, but wondered where the fresh ones are? Then I found them…ahhhh…sitting there in the fruit market, tiny, gold Apricots. I bought them that day and have been in love with them ever since. So, here’s a Closer Look at Apricots and why you should eat more of them.

What are Apricots?
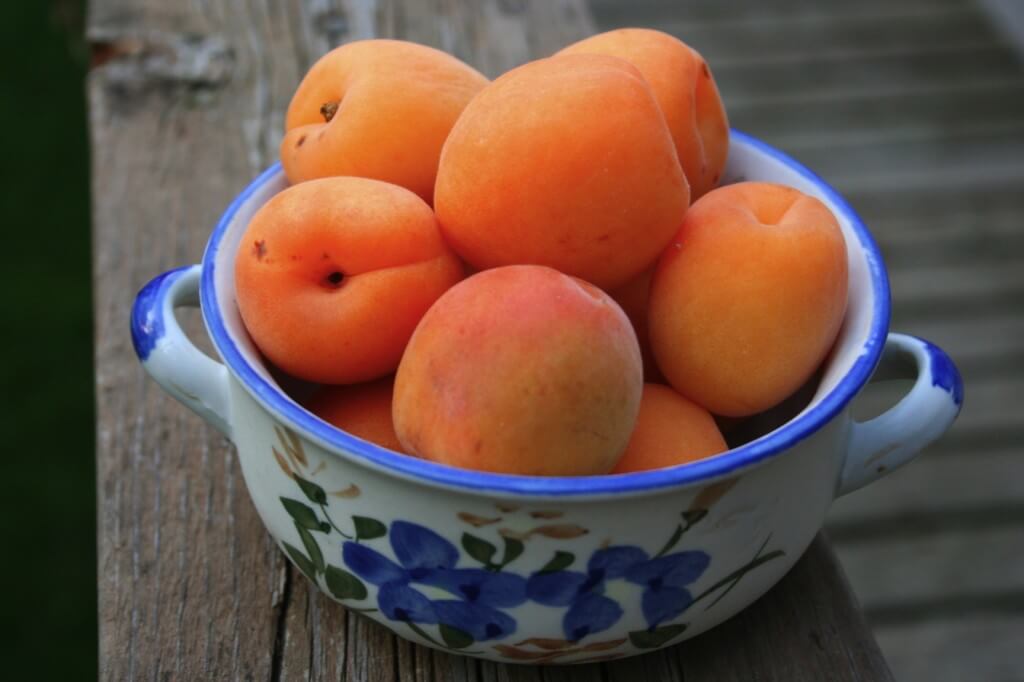
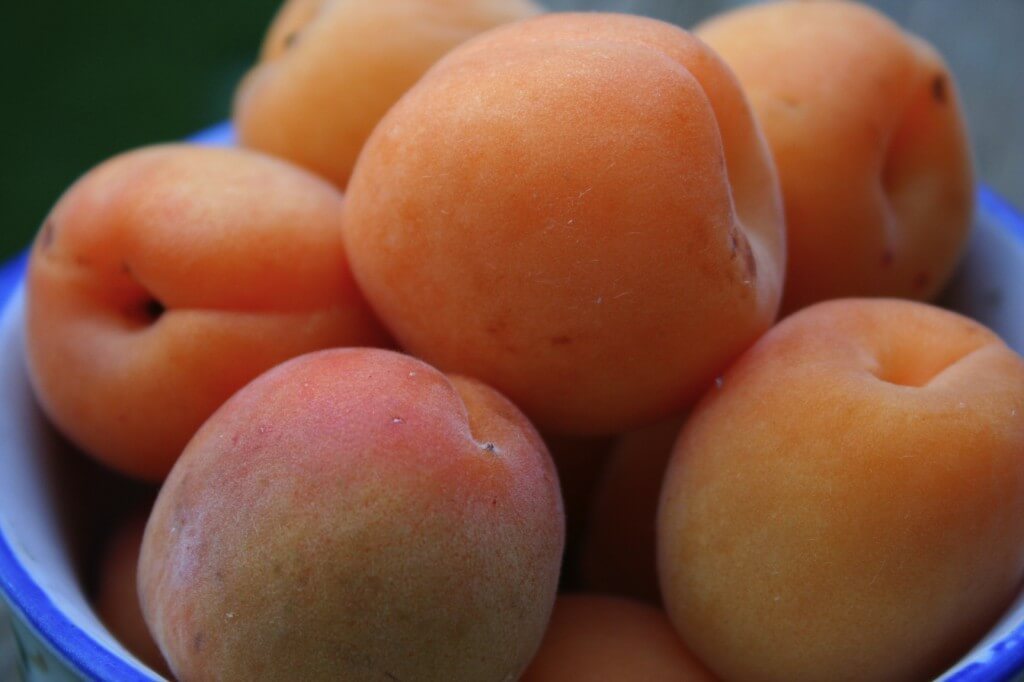
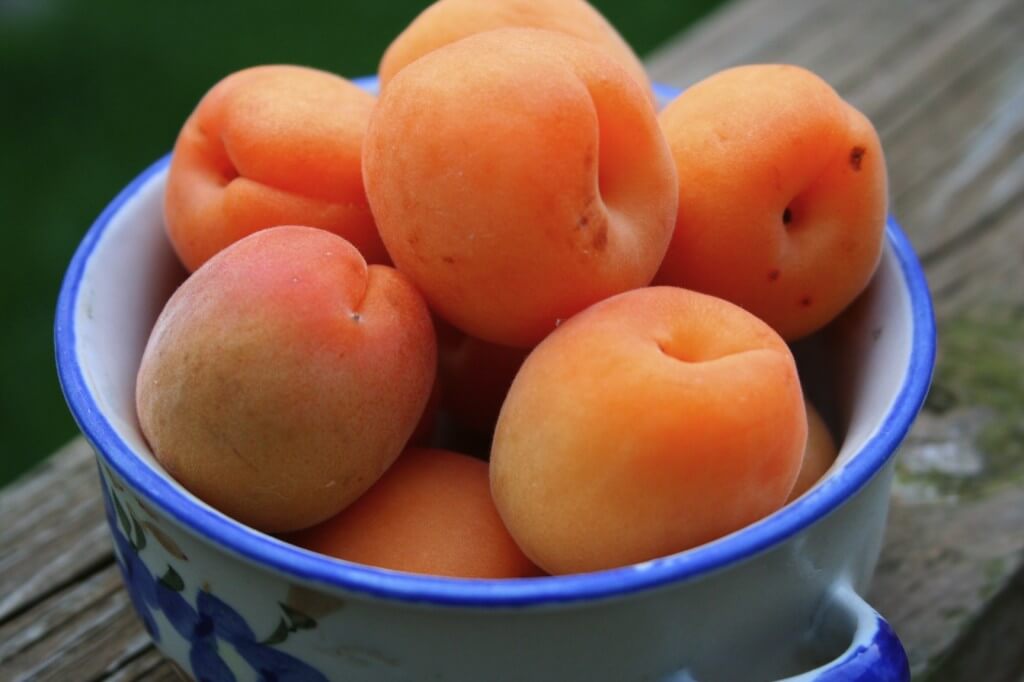
Related to peaches these golden little fruits are a bit smaller than peaches, but still have the fuzzy skin. They are in the stone fruit family along with peaches, plums, and nectarines because of the pit in the center of the fruit that is much like a stone. They’re not quite as juicy as peaches, but are still very sweet with a slight tartness. Apricots are in season until the Fall.

How to select the best Apricots?
These little guys should be free of bruises or mold spots. The color of the skin should be a bright golden color. The fruit should be firm, but you should be able to press into the skin a little.

What are the health benefits of Apricots?
In just one cup of Apricot halves you will get 60% of your daily amount of vitamin A, over 25% of your vitamin C, as well as vitamins K, E, and folate. These tiny golden fruits also offer calcium, iron, magnesium, and potassium. They will also help you to reach your daily amount of fiber.

How do you eat Apricots?
No need to even peal the skin off these little guys, since the fuzz is less than that of a peach. I recommend just biting into this tasty treat. A couple bites is all it will take. If you’re looking for a way to prepare these, you can use them in anything you’d use peaches in, like pies, cobblers, or on top of ice cream.

I hope this will encourage you to look for these sweet little golden guys the next time you’re at the fruit market. Eat up the tastes of summer while they last! Enjoy!

Resources:
http://nutritiondata.self.com/facts/fruits-and-fruit-juices/1827/2
http://www.whfoods.com/genpage.php?tname=foodspice&dbid=3
http://agsci.psu.edu/fphg/stone

Nutritional Type: Eat Right for Your Body Type

Nutritional Type: Eat Right for Your Body Type

If you’re ready to shed a few extra pounds or just want to feel more energized you’ve got to check out Nutritional Typing. I’m really not a big believer in diets to solve weight issues. And if you struggle with lack of energy and fatigue coffee and energy drinks throughout your day are not the answer.

First things first…Why not diets for weight loss?
“Diets” (in the sense of a weight loss plan) tend to be generalized plans. These plans generally cut something out, like calories, fat, carbs, sugar, meat, grains, etc. From my personal experience, my own research, and stories from others I really believe that everyone does not benefit from the same dietary plan.

One person may lose 60 pounds on the ‘Atkins Diet‘ which cuts carbs but still allows higher fat foods, while another person may lose 60 pounds from a diet that is lower in fat but allows carbs. Reverse the 2 people’s dietary plans and they may lose no weight at all. If you happen to find the right diet for you, you may be able to shed the initial pounds you want to lose, but keeping off the pounds may be a huge challenge.

My solution: to the challenge of finding the right dietary plan and sticking to it is to find your Nutritional Type.
Nutritional Typing focuses on how your body reacts to the foods you eat. Some people may be very energized after eating a large plate of pasta, while another person may be ready for a nap after that same meal. Nutritional Typing can help match you up with the foods that will contribute to a healthy weight and the maximum energy for your body. Nutritional Typing is meant to be a way of eating. It doesn’t deprive you of any one food, but helps you to focus your eating on the foods that give you the most energy and help your metabolism kick in.

What about the Energy Issue?
Nutritional Typing can help you get the maximum amount of energy from your food. The general American diet is saturated with sugar, carbs, and sodium. And unfortunately for the majority of the population these don’t contribute to lasting energy.

How to find out your Nutritional Type
There are 2 sources that I think are pretty accurate Nutritional Typing tests:

Dr. Mercola’s Nuritional Typing Test is the first. This test is a series of questions you answer and as a result you are matched up with a Nutritional Type. There are 3 Nutritional Types that you could be according to this test: Carbohydrate Type, Protein Type, or Carb and Protein Combo Type. This test also hooks you up with meal plans to help you eat according to your type. Its a free test, you just create a log in. Check out this link: http://nutritionaltyping.mercola.com/login.aspx?ReturnUrl=%2fPreTestx.aspx

The other Nutritional Typing Test is a general informational video from The Today Show that has you look at where you gain weight and helps match you to the foods that will keep you lean and full of energy. Check out the video:

Start Gardening: Part 4

Start Gardening: Part 4

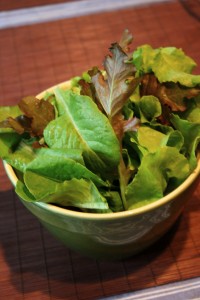
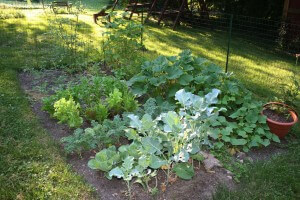
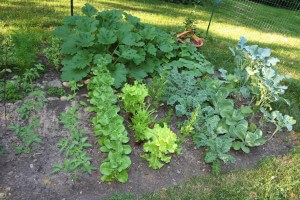
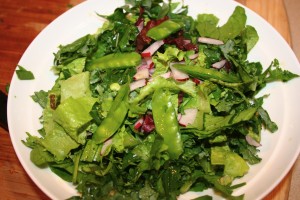
Its been a while since you’ve seen my garden plot and wow has it grown! We’ve harvested tons of lettuce (loose leaf, bibb, and spinach) and have made tons of garden fresh salads.

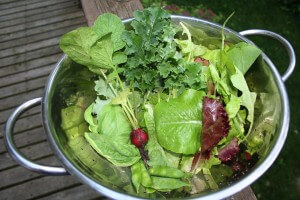
The great part about lettuce is that it continues to produce more delicious leaves after you pick them. We haven’t replanted the lettuce at all and yet we’re still getting more and more! I have to admit that I’m not much of a salad girl, but when it comes to garden fresh, I love it. Check out these tasty salads.

I’ve also started to pick kale and cabbage leaves and chop them in with my other varieties of lettuce for my salads. They’re both kind of bitter, but mixed in with the other varieties they add a great melody of flavors and tons of extra vitamins and minerals.

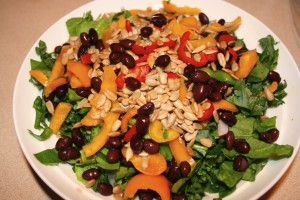
To turn this garden salad into a heartier dinner salad I added black beans, sunflower seeds, and sliced yellow and red peppers. With a simple olive oil and balsamic vinegar dressing (1:1 ratio of each) it brings the flavors all together.

This is our second planting of radishes and they are a great addition to salads and a really spicy snack with hummus.

We’ve also recently harvested some small carrots. I must admit I was really a skeptic when it came to the carrots. I really didn’t think they would grow but much to my surprise, they proved me wrong.

My proud gardening hubby, very pleased with his harvest.

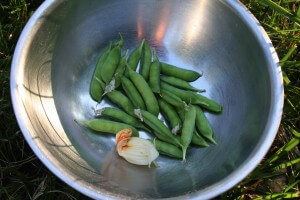
We’ve also picked a small bunch of really sweet peas and a few squash blossoms (post to come on how to eat these).

We haven’t really done anything special to get our garden growing along…just plenty of sunny days (provided by the Lord), water, and lots of love. Squash and tomatoes to come soon!

Closer Look: Okra

Closer Look: Okra

Today I’m taking a Closer Look at Okra…not Oprah…Okra. You know its that thing they deep fry down South! If you’re not from the South you may never have really tasted or even seen Okra. My Southern mother has always talked about how she loves fried Okra, but I had never really tasted it or cooked with it for myself.

I can’t say I ever really even thought about using Okra in my cooking, until I ran across a recipe a couple weeks ago that called for it. Being the adventurous foodie that I am, I thought “yes, a new food to try.” I didn’t even know if I would be able to find it at my local supermarket, but sure enough it was there and on sale…even better! So, let’s take a Closer Look at this Southern favorite.

What is Okra?
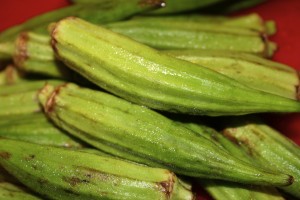
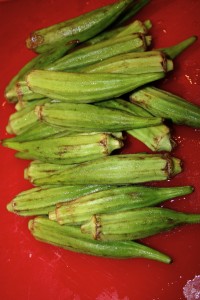
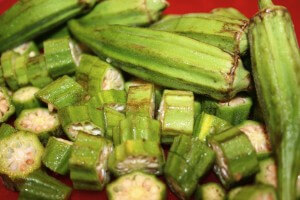
Okra is a plant (crop) grown in tropical, warm climates. In fact, its a staple vegetable in hot, tropical regions. The edible part of the plant is the “fibrous fruit” or pod that shoots off the plants’ stalks. Inside each pod lies tons of small white seeds…don’t worry the seeds are really soft and edible. When you cut into each pod you’ll notice there’s a thick liquid that surrounds the seeds. Cook it and you’ll never notice that texture of the liquid or the seeds.

The pods are harvested off the plant before they’re fully matured and are eaten as a vegetable, most often cooked somehow in the preparation.

How to select the best Okra?
Look for small fresh, crisp, green pods that are free of mold and large spots. Once you get the pods home, store in the fridge and prepare while they’re still fresh.

What are the health benefits of Okra?
Okra is high in fiber, which is perfect for keeping your weight down and your digestion working properly. The combo of the fiber and thick liquid contained in the pods assist your body’s natural peristalsis, moving food through your intestines, preventing constipation.

These pods are loaded with anti-oxidants and vitamins A, K, C and folate. Okra is a great source of minerals as well, including iron, calcium, manganese, phosphorous, potassium and magnesium. Okra’s glycemic load is low (its low in carbs), meaning it won’t spike your blood sugar.

How do you prepare Okra?
Start by thoroughly washing the pods with cold water. For most preparation methods you’ll need to cut away the crown and tips and cut the pods into small sections. You can then batter and deep fry if you so choose. But, there are much healthier ways to prepare it like pan frying it with other veggies. Or try boiling it or adding it to stews. You can also pickle whole Okra pods. Can’t say I’ve ever had it pickled, but I’ve heard its delicious.

Stay tuned this week to see my recipe I made with Okra.

Resources:
http://www.nutrition-and-you.com/okra.html

http://nutritiondata.self.com/facts/vegetables-and-vegetable-products/2498/2

Mac & Cheese with Sausage

Mac & Cheese with Sausage

After a little bloggin’ break last week, I’m back and diving right in to a new tasty recipe!

So, I’ve been dairy free and egg free for almost 2 and a half years and gluten free for almost a year and a half now. I follow this diet pretty stringently, as I feel so much better when I eat this way. People always ask me “how do you do it?” and say “I could never do that.” My response: By the grace of God I am able to follow this diet and eat an abundant variety of foods even on this strict diet. And if you felt as bad as I did 2 years ago, you would be able to do it too.

Despite my new outlook on food and disciplined eating habits, the one thing I have been craving for 2 and half years is….duh, duh, duh…drumroll…….MAC & CHEESE! Yes, I am dairy free and have a serious obsessive love for cheese….terrible, I know. And yes, even after 2 and a half years of not partaking, this wonderful food has left a great impression I don’t think I’ll ever stop craving.

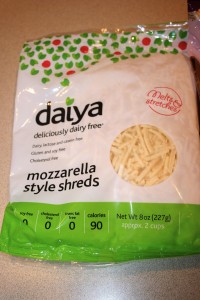
Long story short, I’ve gone to the health food store a few times, paid 6 bucks for a block of “cheese” (rice cheese, veggie cheese, soy cheese) that says “It Melts” on the package. Sure enough I get it home and it doesn’t melt and tastes like salty rubber…yum. So, I pretty much gave up on using cheese substitutes…until…(heavenly sound) ahhhhh…I found this cheese substitute.

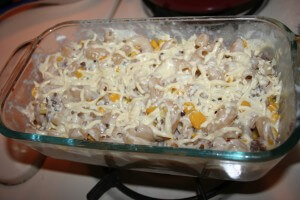
Daiya cheese has been a new found love of my palette. It tastes really good, replicates cheese really well, and it actually melts without a rubbery texture. This one is also casein free. I tried one cheese substitute that was really good, but still had casein (another protein found in dairy that people who are lactose intolerant can often still tolerate) which made me sick. I buy Daiya cheese at Whole Foods and can now make Mac & Cheese. So, here’s the Mac & Cheese with Sausage I made.

Ingredients:
3 cups (12 ounces) gluten free elbow pasta or other short pasta
3-4 Italian sausages (casings removed) or about 1 pound ground Italian sausage (mild or hot)
1 1/2 cups frozen corn
1 cup gluten free chicken stock
2 1/2 cups shredded cheese (dairy free cheese)
*Note: if you’re using real cheese, I recommend you use half Velveeta and half shredded cheese.

Directions:
1. Lightly oil a deep oven proof baking dish.
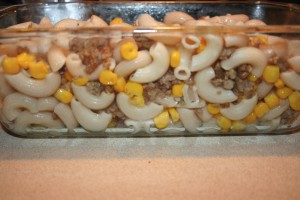
2. Cook pasta in salted water until al dente. Drain and transfer to prepared baking dish.
3. While pasta is cooking, saute sausage until brown. Add corn, stirring to combine.
4. Using a wooden spoon, gently fold meat mixture into pasta.
5. Heat chicken stock in saucepan until hot but not boiling. Remove from heat add 2 cups cheese. Stir until smooth and pour over pasta. Gently toss to coat.
6. Top mixture with remaining cheese. Cover dish with wet paper towel and microwave on medium high for 5 minutes or until bubbly. Enjoy!

I served my Mac & Cheese with Sausage as the main coarse with a veggie side of steamed broccoli. Craving satisfied…although I’m craving it now just writing about it!

*Recipe Source: Living Without: The Magazine for People with Allergies and Food Sensitivities. Feb/ March 2011 edition. Article by Beth Hillson

Closer Look: Kefir

Closer Look: Kefir

Today I’m taking a closer look at Kefir. When you have to eliminate foods from your diet like I have had to do over the last few years, you have to add new foods back into your diet or you tend to eat the same things over and over again. One of the new foods that I have more recently discovered is Kefir.

What is Kefir?
According to Dr. Mercola, “Kefir is an ancient, cultured enzyme-rich food full of friendly microorganisms that balance your ‘inner ecosystem’ and strengthen immunity.” Think of Kefir as a yogurt you drink. Kefir itself is a grain that is gluten free and is used to culture milk to turn it into a type of yogurt that has become known as Kefir. So, when people refer to Kefir most of the time they’re referring to the cultured milk product not the actual grain.

Why eat Kefir?
Kefir is full of good bacteria, vitamins, minerals, and proteins. Ancient cultures from all over the world have used yogurt type foods to cure all sorts of ailments from gastrointestinal problems, to skin irritations, to sinus and breathing issues. Modern medicine has tried all kinds of foreign substances to heal these health issues and they are now resorting back to this ancient wisdom of health and healing. You’ve seen the evidence of this on tv even; you know Activia yogurt and Align probiotic supplements. Kefir is a traditionally consumed in Russia and the Middle East.

Basically good bacteria (pre and probiotics) help to maintain your intestinal balance. The good bacteria fight off the bad, disease causing bacteria, as well as unhealthy yeasts that can over run your body. Cultured foods found in people’s diets all over the world provide these good bacterias that keep your gut healthy and therefore keep your immune system in top working condition. These cultured foods include natto, kimchee, miso, tempeh, pickles, olives, sauerkraut, yogurt, and kefir. I can’t say I know what all of these are, so that’s why we’re starting with kefir.

Why you should eat Kefir if you’ve taken rounds of antibiotics for other health issues?
Kefir is a natural source of good bacterias that are beneficial to your immune system function. If you’ve suffered from any illness that has resulted in you having to take many antibiotics Kefir would be a great food for you to incorporate into your diet. Antibiotics do help to treat various sicknesses like sinus infections, tonsil infections, and a variety of other infections, but they also wipe out your body’s natural good bacterias as well. This lack of good bacterias can make you very susceptible to another infection of the same or a different kind or can lead to a variety of stomach or intestinal issues.

After antibiotics always follow with a protocol of probiotics for a few months to build your good bacterias back up. Try Kefir to assist with this.

Why try Kefir rather than yogurt?
Kefir contains many more strands of beneficial bacteria than yogurt does. It also contains many beneficial yeasts as well.

For more detailed information check out this resource: http://www.kefir.net/kefiryogurt.htm

What if I can’t eat dairy, can I still eat Kefir?
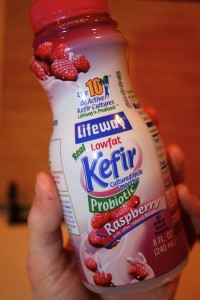
Kefir is generally cultured cow, sheep, or goat’s milk. If you are lactose intolerant you may still be able to eat Kefir as the good bacteria in it consume most of the lactose. If you’re like me and you cannot tolerate other parts of dairy like the casein, then try coconut milk Kefir.

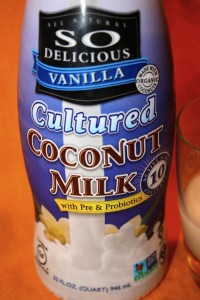
I know you can make your own, but I haven’t gotten that adventurous yet. I found this cultured coconut milk drink (pictured above) (So Delicious brand’s Cultured Coconut Milk) at Whole Foods. Its a little different from traditional Kefir in that this particular one uses inulin from chicory root to ferment it, but its the same idea.

How to eat Kefir?
Drink it straight. Pour it over berries or granola. Blend it with fruit to make a smoothie.

Where do I buy Kefir?
Health food stores and Whole Foods are great places to start looking. But, I’ve also found the regular Kefir (cow’s milk) at grocery stores that carry a variety of cultural foods.

You can also make your own Kefir, which is probably very cost efficient and also ensures that you’ll get the highest potency of the good bacterias. I have to admit that I haven’t tried this yet, but definitely plan on it in the future. If you want to try making your own you can buy the Kefir grains onlne from a variety of sources and most of them show you exactly how to do it.

Here are some resources to get you started:
http://www.kefir.net/sources.htm

http://rawglow.com/blog/2009/08/15/your-guide-to-making-raw-coconut-kefir/

http://www.thenourishinggourmet.com/2009/03/coconut-kefirs-health-benefits.html

Other Resources:
http://articles.mercola.com/sites/articles/archive/2009/12/08/Top-12-Foods-for-Healthy-Immune-Response.aspx

http://www.celiac.com/gluten-free/topic/3238-kefir/

Closer Look: Radishes

Closer Look: Radishes

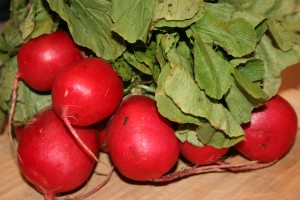
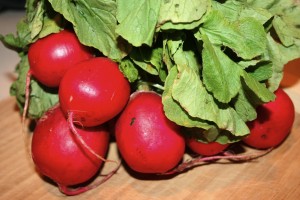
Today I’m taking a Closer Look at radishes. If you’re like me, you’ve seen others eat them, tried them once or twice in the past and didn’t like them. My grandpa used to grow them and my husband has grown them and I just always thought that I didn’t like them, so I didn’t eat them.

So, why am I taking a Closer Look at radishes today? I was at my friend Mary’s house for a party a couple months ago and she had radishes on an appetizer tray. I tried them and actually really liked them! Who knew? It hadn’t been that long before that I tried them and didn’t like them. But for what ever reason I do now and I’m really glad. So here’s a Closer Look at these little red roots and why you should give ‘em a try again!

What are radishes?
Radishes are a member of the cruciferous family, which means they’re related to broccoli, brussel sprouts, and cauliflower. There are several different varieties of radishes. They vary in color from red to purple to black to white. They can be very small or rather large. You can not only consume the root, but the greens as well. The mustard oil found in the vegetable gives it its tangy flavor.

How to select the best radishes?
Look for radishes that have brightly colored roots that are firm and have crisp greens.

What are the nutritional benefits of eating radishes?
These little guys are packed full of the good stuff. They are high in the cancer fighting antioxidant vitamin C and the greens have even more than the roots. Radishes are a great source of folic acid, calcium, iron, potassium, and thiamine. They are a great source of fiber and have been traditionally used to relieve constipation and assist with weight loss. They’re low in carbs and help to keep the liver and kidneys functioning properly.

What are some various ways to use prepare radishes?
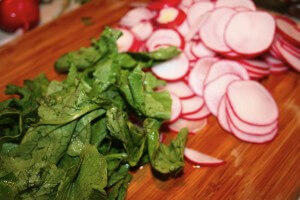
You can eat radishes and their greens raw. They make a nice addition to salads and veggie appetizer trays. I like to eat them raw with hummus. You can saute them and include them in a variety of dishes. Add them into anything you want to add a little zing to, including pasta dishes and vegetable sautes.

Stay tuned this week for one of my new favorite pasta dishes using radishes.

I hope you’ll give radishes a first or maybe a second try. You never know, they could become a new favorite for you!

*Source: www.brighthub.com/health/diet-nutrition/articles/42219.aspx

Delicious Gluten Free Bread

Delicious Gluten Free Bread

I have to confess that this week I’ve been thoroughly enjoying rediscovering why the American diet consists of so much bread…I mean, I can’t eat gluten so its “Special Bread” but its still bread none the less. After all bread can be made into toast, used to create a delectable sandwich, or eaten as a side with soup. And I’ve really been enjoying it this week.

If you’re like me and you are gluten free, then you know what I mean when I say I don’t take bread for granted like I used to. Because of my combination of gluten, dairy, and egg intolerances many of the premade gluten free breads are not options for me. And to be honest the premade gluten free breads that I have had are really not that great. They crumble to pieces when you try to eat them and tend to be very gritty in texture.


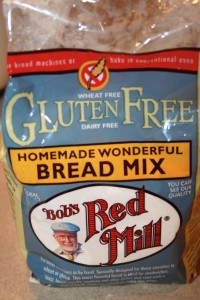
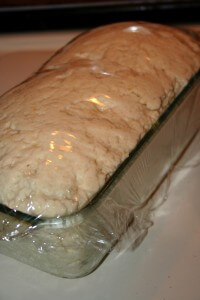
So, today I’m sharing my secret on how I enjoy delicious, soft, chewy bread that doesn’t have gluten, dairy, or eggs in it. I make my typical bread I use for sandwiches or toast from Bob’s Red Mill Gluten Free Homemade Wonderful Bread Mix. And can I just say that it is indeed Wonderful!

The bread mix comes with a yeast packet and the other dry ingredients for the bread (various other flours blended). You’re just required to add some sort of milk (I use rice milk), eggs (I use egg replacer), apple cider vinegar, and butter.

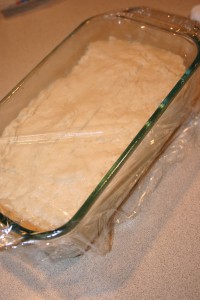
The bread can be made using a hand mixer and an oven or you can use a bread machine. I generally blend all the ingredients together using my hand mixer. Then I let the bread rise for about 45 minutes and bake it for 45 minutes to an hour.

I know it does take a good amount of time to make it, but the ability to enjoy delicious sandwiches and toast makes it so worth it. I really love that I have been able to buy this particular bread mix at my local supermarket and also have found it at Walmart. It makes it nice not to have to make a separate trip to a specialty store during busy weeks.

The full directions to make this bread are on the package, so no need to list them here. I just wanted to open up your gluten free world to my favorite bread. Its been a sanity saver on my diet. Even though you’re gluten free you can still enjoy piece of toast at breakfast or a sandwich for lunch. So, eat up!

Allergy Sufferers’ Relief

Allergy Sufferers’ Relief


Happy Spring! Its now officially Spring and with Spring comes beautiful flowers, green grass, budding trees, warming sunshine, and hazy rainy days. But, Spring also means hello allergies once again!


Not to be “debby downer” because despite my own allergies I gladly welcome budding plants, green grass, and warmer temps. After all I do live in Chicagoland, where winter hits and it hits hard, so I’ve been ready for Spring since December.


Some may say if you suffer from Spring allergies just stay inside. This is definitely not an option for me as I crave the outdoors. So, in this post I’ll give some basic information about allergies and how I’ve gone about treating mine. Throughout the post I’ll post some beautiful Spring photos to remind you why staying indoors is last resort to managing your allergies.


First thing’s first, what are allergy symptoms?

Allergies symptoms can be quite varied, but here are some basic symptoms:
Runny nose Post nasal drip
Sinus headache (including pressure at the base of the back of the skull and into the upper neck)
Red, itchy eyes Coughing
Sneezing Wheezing/ Shortness of breath
Itchy nose and throat Conjunctivitis
Skin rashes


Second, what are you actually allergic to? When people say they’re allergic to pollen that can be true, but isn’t quite accurate enough. There are many different types of pollen. Knowing which ones you’re sensitive to is important.

Here’s a breakdown of seasonal allergens:


Tree Pollen- If you have symptoms as early as February through as late as May, then tree pollen could be your trigger. Even before you see buds on trees up North the tree pollen from the southern states actually blows up North with southern gulf winds.

Grass Pollen- If your symptoms don’t start peaking until May then grasses may be your trigger. Grass pollen will generally begin in May and last through August. If you head outside on a sunny day and your neighbors are all mowing their lawns and you begin reacting, then grass may be your trigger.

Weeds- If your allergy symptoms seem to be the worst from June until the first frost then weeds could be your trigger.

Ragweed-
This famous Fall allergen will start to effect sufferers from August until the first frost.


Then there are year round environmental allergens you should also be aware of:

Molds- Indoor molds are present year round. But, outdoor molds peak in the damp months of Spring when the snow melts and it rains more frequently. Outdoor field molds (meaning smuts, mushrooms, and field grain dusts) are year round except when the ground is frozen completely.

Dusts and Danders- These are year round, but increase indoors when the forced air and furnaces are turned on.

You may have one of these allergies or, like me, you may have them all.
So, how do I treat my allergies and their symptoms? Other than just taking typical allergy medicines there are lots of short term (quick fix) treatment options you can implement to reduce your allergy symptoms and many of them are free.

Here are the Top 10 things that have helped me to reduce my allergy symptoms:

1. Don’t sleep with your windows open. I love having fresh air blowing through my home, but keep them closed especially at night. Leaving them open, especially at night, allows pollens to blow through your home all night while you’re laying there breathing them in.

2. Keep your home clean. Stay away from antibacterial cleaning products (Lots of research backing this one up, but that’s for another post. Trust me on this one.). Vacuum, dust, and wet mop your home often.

3. Protect your bedding with allergen/dust mite protecting covers. Most allergist will recommend that you get these covers for your mattress, comforters, and pillows. If you can only afford to get covers for one item get a cover for the pillow you sleep on. It makes a world of a difference.

4. Wash your bedding often. Wash your sheets and blankets in hot water to kill mites and get rid of pollens and danders that you’ve brought to bed with you. I’ve found that even if I don’t get around to changing my bedding as often as I should, if I change my pillow case, even that makes a huge difference.

5. When my allergies are worst (late Spring through late Fall) I have found that showering or at least rinsing off in the shower before bed has made a huge difference for me. When pollens are at their peak and you’re outside, you’re collecting all those pollens on you hair, skin, eye lashes, and clothing throughout the day. Then when you go to bed, you’re taking all those pollens to bed with you. Showering at night helped me even more than allergy medicines last Summer. Try it!

6. Change all your clothing before going to bed. For the same reason as #5. Your clothes gather pollens and danders throughout the day. If you go to bed wearing that clothing, you’re bringing all those allergens to bed with you.

7. Use a nasal rinse, like the Netti Pot often during your peak allergy seasons. I know I’ve posted about the Netti Pot before, but it’s really been a life saver for me. During peak seasons try using it at least 2 times a day. It is a bit of a hassle, but really helps to relieve sinus pressure, congestion, and sinus headaches. I know the idea of saline liquid going through your nose isn’t really appealing and feels odd, but try it more than once. The first time its really strange, but I’ve gotten used to it. You can pick up a Netti Pot kit at the drugstore. Click here to see my previous post on the Netti Pot.

8. Wash your throw blankets and pillows often in hot water. You may forget about your pillows on your couch and those blankets you love to curl up with while watching a movie, but they collect dust, dander, and pollens just like your bedding. So, don’t forget to wash these often.
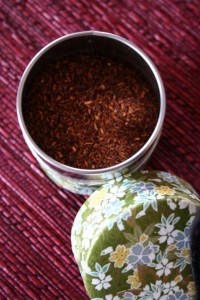
9. I discovered Roobios loose leaf tea (red tea) a couple years ago. I’ve found that high quality Roobios loose leaf tea relieves my allergy symptoms. It especially helps to relieve wheezing, coughing, and tightness in the chest. It has to be high quality, or I’ve found it doesn’t really work. I buy my Roobios Tea online from Our Special Tea.

10. Buy an air purifier for your home. Get one that has a a true HEPA filter (a HEPA type filter is NOT a HEPA filter) and a carbon filter. Run the purifier especially in your bedroom at night to reduce your symptoms. I have a Holmes air purifier that I use often.

Long Term Allergy Treatment:
Because I have so many allergies and they are pretty severe, I’ve turned to long term treatment for my allergies by doing immunotherapy allergy shots. The shots work by gradually introducing the allergens back to your body to reduce your body’s reaction to the allergens. They are not a short term fix. I have completed one full year of the shots and this year I’m feeling much better than last year. If you’d like to get more information on immunotherapy allergy shots click here for a link to my allergist’s website.

I hope this information will help you to manage your environmental allergies and their symptoms so that you can enjoy the great outdoors this Spring, Summer, and Fall and be comfortable indoors during the Winter. Just remember there is more that you can do to manage your allergies than just taking your typical allergy medicine. Here’s to beautiful Spring days!
Closer Look: Collard Greens

Closer Look: Collard Greens

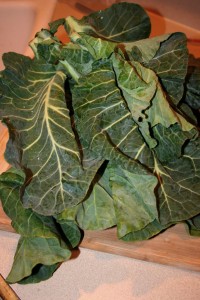
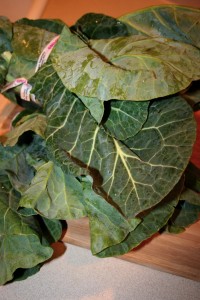
If you grew up down south, Collard Greens were probably a staple in your diet. But, for us yankees (as my southern grandfather called us northerners) Collard Greens may be totally foreign to you. So here is a Closer Look at Collard Greens, followed with Collard Green recipes posted later this week.

How to choose the best Collard Greens?
Collard Greens are in season from November to April. Look for leaves that are bright green and crispy with stout stalks, not yellowish or wilted.

What are the nutritional benefits of Collard Greens?
Collard Greens are low in carbs and packed rich with vitamins A, C, K, E and folate. They also contain a significant amount of omega-3 fatty acids, calcium, and dietary fiber.

How do I prepare Collard Greens?
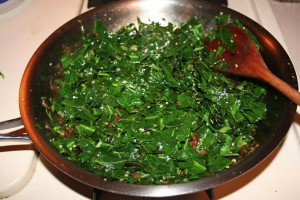
Both the stalks and leaves can be eaten. The leaves and stalks should be washed thoroughly first. You then cut the leaves into small strips. I most commonly sautee the greens in a little olive oil in a frying pan with a little minced garlic, salt, pepper, and lemon juice. You can then add the sauteed leaves into soups, stews, or eat them as a side dish. You can also eat them raw blended with other salad greens or include some raw leaves in your fruit smoothie (trick here: more fruit than veggies and you won’t even taste the veggies).

Stay tuned this week for recipes using Collard Greens!

Sources: http://nutritiondata.self.com/facts/vegetables-and-vegetable-products/2410/2

http://www.nutrition-and-you.com/collard-greens.html