Category Archives: Lovin’ It

Madindy on Etsy

Madindy on Etsy

At the end of this wonderful Thanksgiving Day I’m excited to announce that I’ve opened my Etsy Shop! Yeahhh! So excited, as I’ve been working on this for a while now. There are now a few items posted and it’s up an running, so very thankful for that.

Etsy.com is an online marketplace for handmade and vintage items. If you’re new to Etsy you’ve been missing out. It’s a great place for Christmas shopping.

My Etsy site is http://www.etsy.com/shop/madindy.

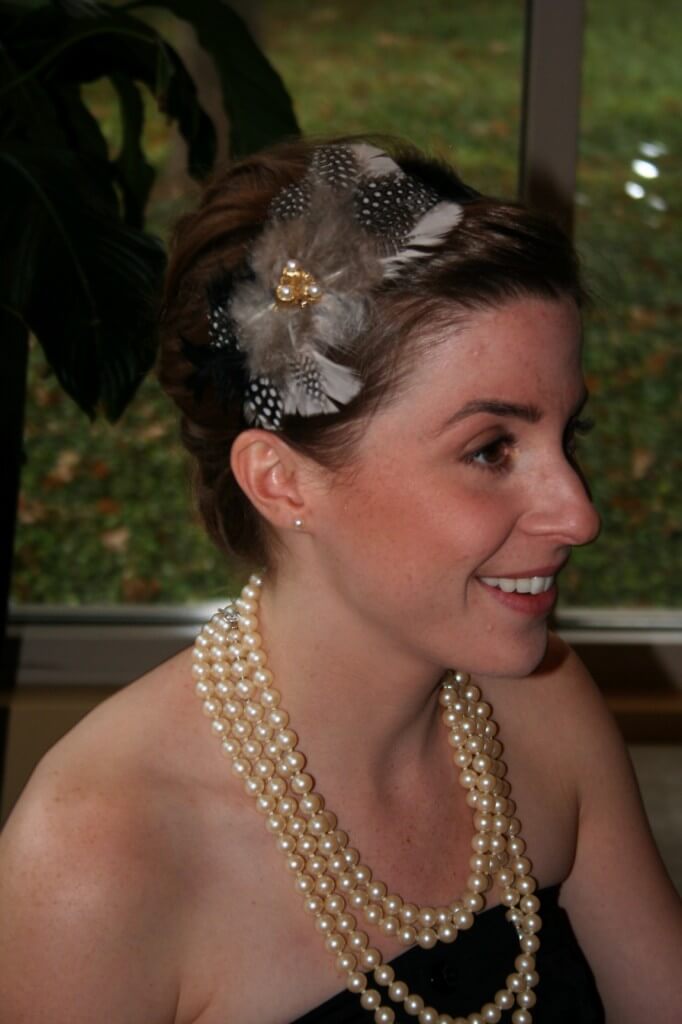
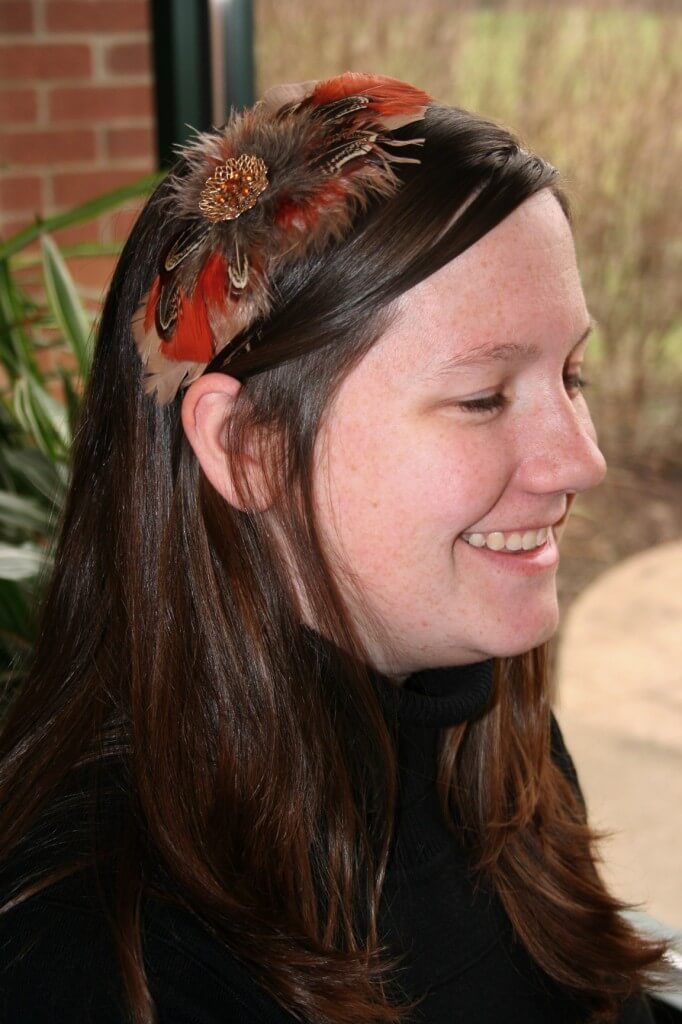
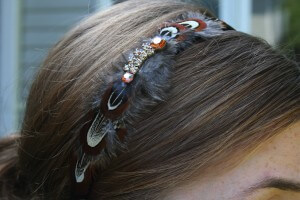
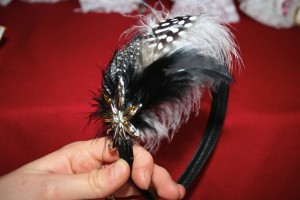
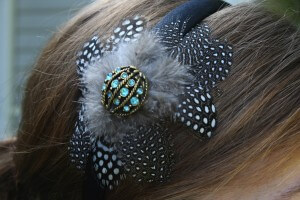
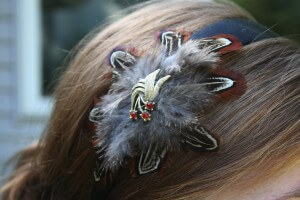
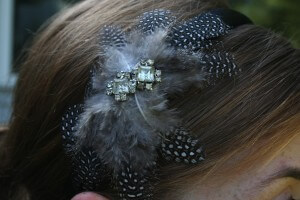
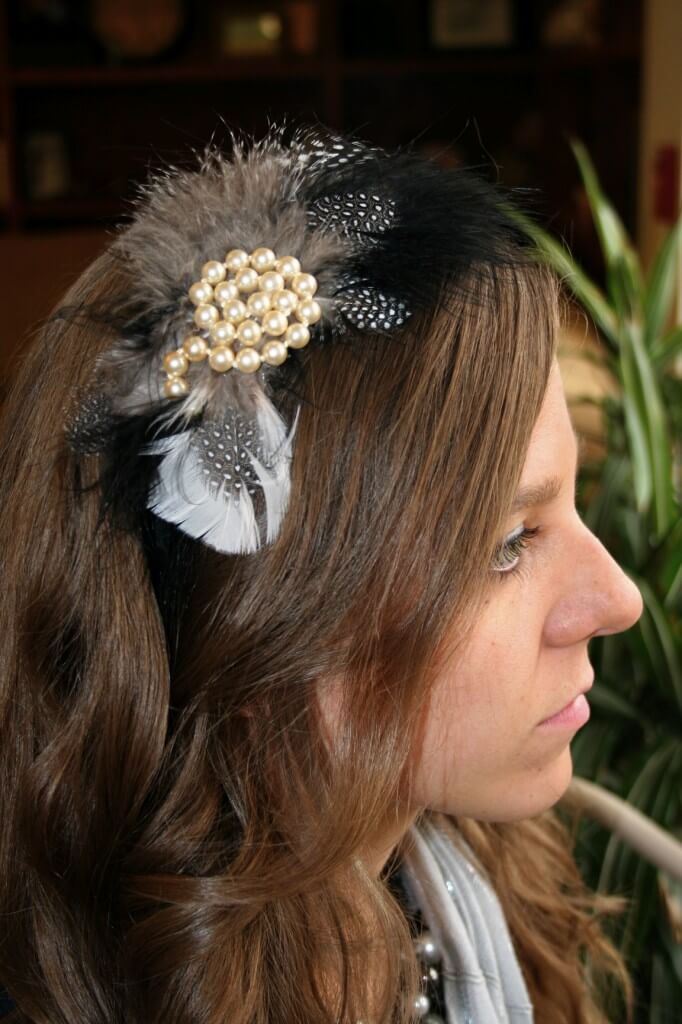
The first part of my Etsy shop that I’ve launched is handmade headbands with feathers and antique jewelry. I design and make each piece myself. Check out my Etsy site for the items still available for sale.

The headband above is still for sale on Etsy, along with others. And below are headbands that I’ve already sold to a boutique and individuals. These have sold like hotcakes, so check out the ones still available by clicking this link http://www.etsy.com/shop/madindy. They make great Christmas presents and are great to wear to parties this time of year!

*A special thanks to my lovely friends for being my models!

Fresh Blooms: Bring ‘em Indoors

Fresh Blooms: Bring ‘em Indoors

Major power outage today in the Chicago’s Northwest suburbs, so I’m seeking refuge in a local coffee shop…never been so grateful for wi-fi, AC, a toilet I can flush and fresh water (we’re on a well, so no power means no flushing and no water as well), and fresh coffee (didn’t get it this morning before the power went out..and I’m no fun to be around if I don’t have coffee).

Apparently the power could be out for a few days, but I’m praying it’ll be back on much sooner. So, with the power out I thought it’d be a good day to show you how to bring the fresh beauty of the outdoors inside without much effort.

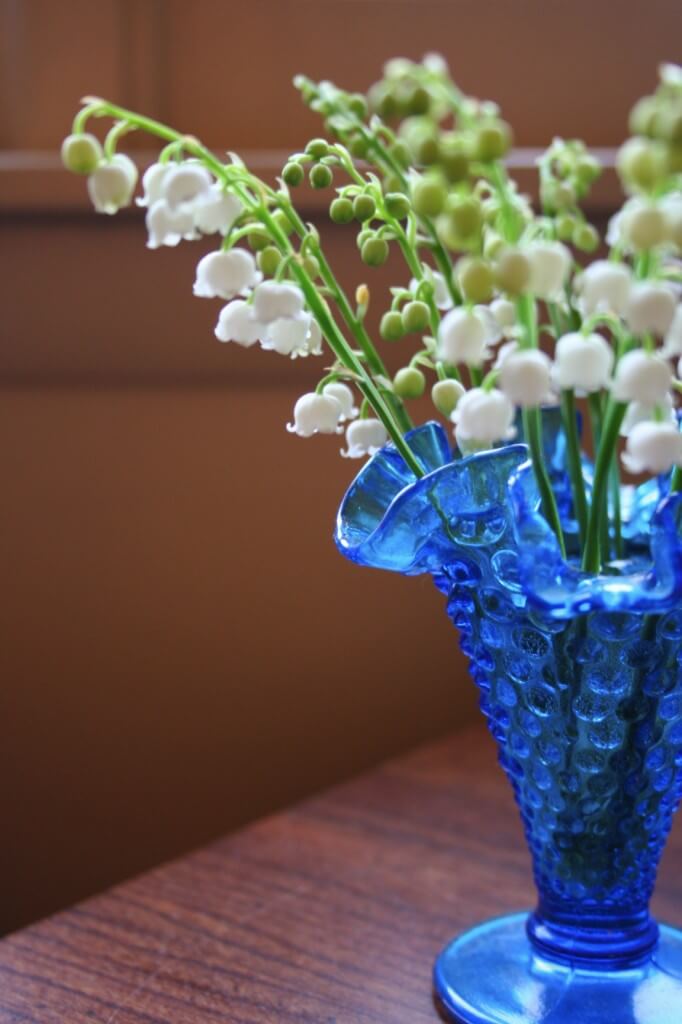
These are some Spring blossoms I brought indoors as they were blooming in my yard. First there was Lily of the Valley. These little bells of fragrance grow very low to the ground and often just look like ground cover growing around trees and in shaded flower beds. Often the leaves of this plant grow pretty thick and cover the blooms from sight, so clipping a few and bringing them indoors really displays their delicate beauty.

For Lily of the Valley I suggest placing a handful of blossoms in a colorful bud vase. Just this small cluster of blooms filled the whole living area of my home with a delightful fragrance…added bonuses of these buds! Keep their vase full of cold water and they’ll stay fresh for about a week.

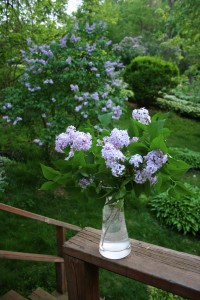
Blooming next in my yard were the Lilacs. My whole neighborhood seemed to be filled with thick Lilac bushes this Spring. Lilacs grow in a variety of colors from purple to pink to white on rather large twiggy bushes. They are extremely fragrant, so a small cluster in a vase can really fill your home with a fresh scent. I’m not a fan of artificial lilac scents, but the real thing is delicious. Caution: some people are sensitive to their scent, but if you’re not, they’re perfect indoors. I suggest clipping a few twigs full of blossoms and placing them in a medium sized, clear vase. These cut flowers remained fresh in my home for about 4 to 5 days.

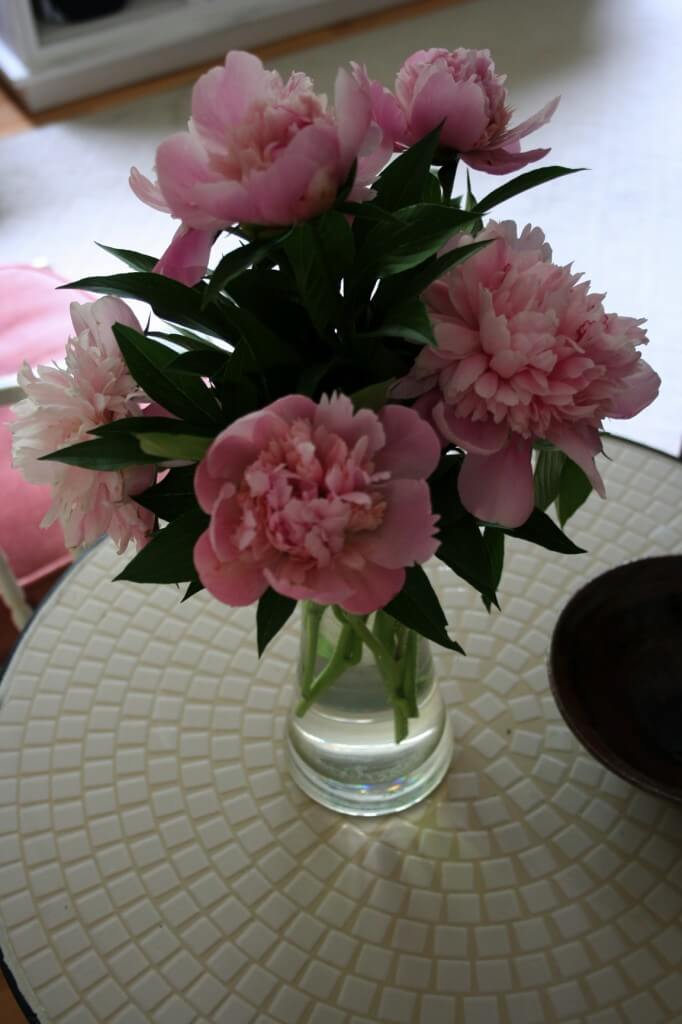
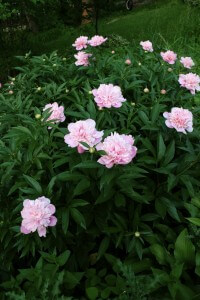
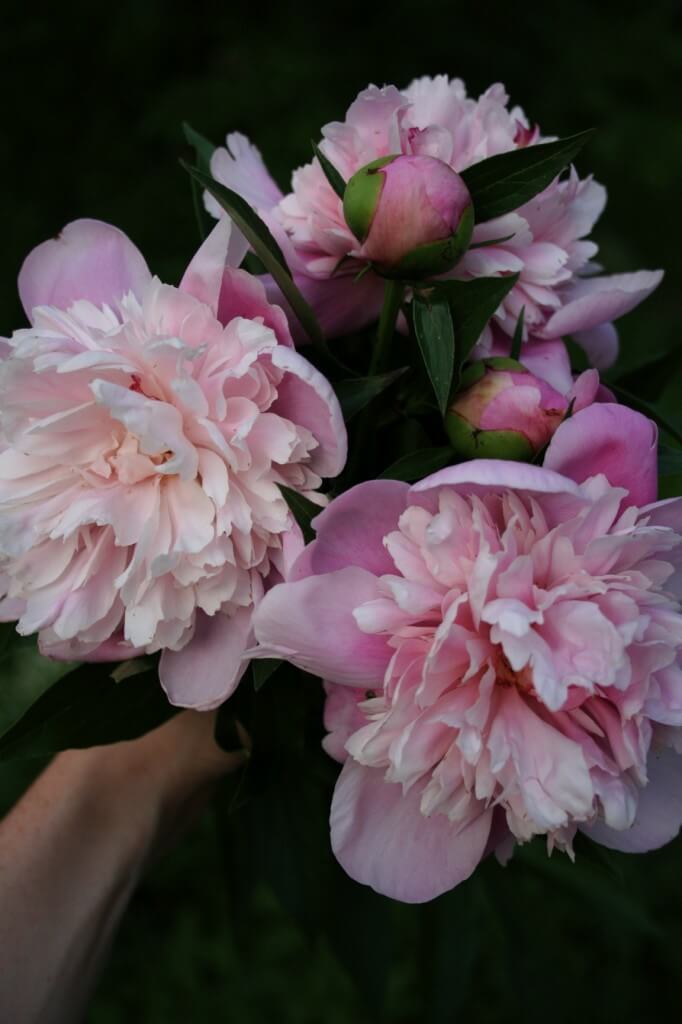
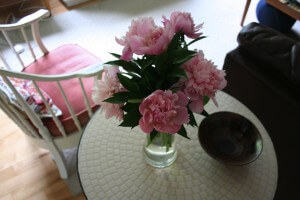
Popping up next in my yard were one of my favorites: Peonies. These delicate flowers grow in medium sized bush fulls in beds that receive partial sun partial shade. Peonies bring a truly romantic air to bouquets and vases everywhere from your home to a bridal bouquet…you can’t go wrong with these blooms, growing in varieties from dark pink to white.

I really think peonies are lovely in the natural bushes outdoors, but their beauty really seems to be displayed the best when they’re clipped and placed in a cluster in a medium to large sized clear vase in your home. They not only bring a fresh fragrance indoors, but add a touch of romance to your interior decor.

When you’re cutting a bunch of peonies, I suggest clipping half blossoms that are already mostly opened and half blooms that are in their bud form. This really seems to make your bouquet last the longest; mine lasted just over a week. Ok if you have peonies in your yard, I know exactly what you’re thinking…”They are always covered in ants outdoors. There’s no way I’m bringing them into my home.” Well, here’s your tip of the day…

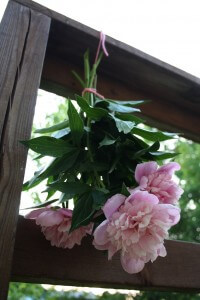
Clip the bunch of peonies, tie some string around the bouquet and hang upside down for about an hour on your porch or deck. With gravity working to your advantage, the ants will work their way out of all the nooks and crannies of the flowers and you can bring your bouquet indoors bug free! Timing wise, clip the blooms before a heavy rain hits, as the rain destroys the blooms on their bushes.

General flower clipping tips to keep your flowers lasting their best the longest indoors:
-Use sharp shears to clip flower stems
-Clip stems at an angle
-Clip the stems a little longer than you want them to be in their vase
-Clip stems outdoors, bring flowers indoors, fill vase with cold water, clip stems again and immediately place in vase
-Keep water in vase free of flower petals and leaves
-Change water in your vase at least every other day
-If its cooler in your home, the clipped flowers will last longer
-Don’t place clipped flowers inside sunny windows
-Clip some flowers that have already bloomed and some just before they bloom to make the bouquets blooms last the longest
-Remove dead or wilted flowers from your vase ASAP

I hope you’ve enjoyed these tips to help freshen your home, bringing the outdoors in. If you live in the Midwest, here are some blooms to start looking for in your yard right now and in the months to come: zinnias, black eyed susans, daisies, cone flowers, hydrangeas, roses, and sunflowers to name a few. Enjoy the season both outdoors and inside your home!

Start Gardening: Part 4

Start Gardening: Part 4

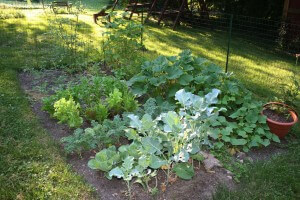
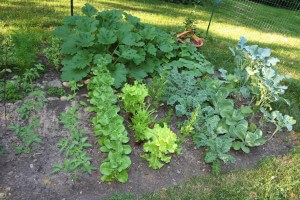
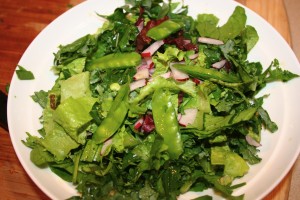
Its been a while since you’ve seen my garden plot and wow has it grown! We’ve harvested tons of lettuce (loose leaf, bibb, and spinach) and have made tons of garden fresh salads.

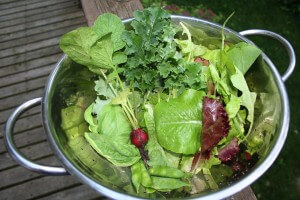
The great part about lettuce is that it continues to produce more delicious leaves after you pick them. We haven’t replanted the lettuce at all and yet we’re still getting more and more! I have to admit that I’m not much of a salad girl, but when it comes to garden fresh, I love it. Check out these tasty salads.

I’ve also started to pick kale and cabbage leaves and chop them in with my other varieties of lettuce for my salads. They’re both kind of bitter, but mixed in with the other varieties they add a great melody of flavors and tons of extra vitamins and minerals.

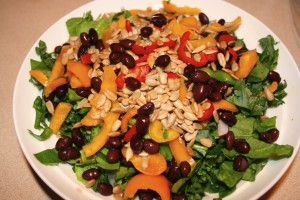
To turn this garden salad into a heartier dinner salad I added black beans, sunflower seeds, and sliced yellow and red peppers. With a simple olive oil and balsamic vinegar dressing (1:1 ratio of each) it brings the flavors all together.

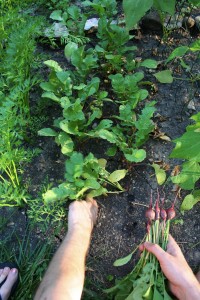
This is our second planting of radishes and they are a great addition to salads and a really spicy snack with hummus.

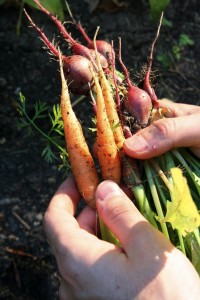
We’ve also recently harvested some small carrots. I must admit I was really a skeptic when it came to the carrots. I really didn’t think they would grow but much to my surprise, they proved me wrong.

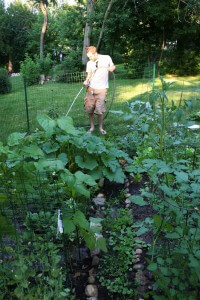
My proud gardening hubby, very pleased with his harvest.

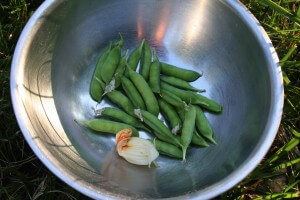
We’ve also picked a small bunch of really sweet peas and a few squash blossoms (post to come on how to eat these).

We haven’t really done anything special to get our garden growing along…just plenty of sunny days (provided by the Lord), water, and lots of love. Squash and tomatoes to come soon!

Re-purpose It: Garden Stakes

Re-purpose It: Garden Stakes

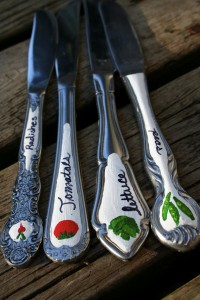
This year has been a perfect growing season in the Chicagoland area, hot sunny days and plenty of rain. My garden is growing nicely. My hubby and I decided to plant such a variety of produce in our garden and I’m always loosing track of what’s planted where. So, I decided I needed garden stakes to mark each item. You know me…I never really think, “oh I’ll just go buy that.” I’m such a do-it-yourselfer, I always seem to think “how can I make it.”

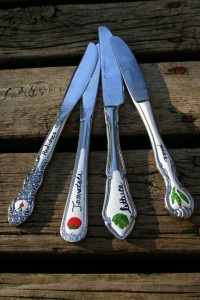
I stopped by the thrift store and found tons of dinner knives (odds and ends from many different sets) and bought a hand full. I broke out my acrylic paints and painted away. To prevent the paint from peeling off of the metal I double coating each knife with water based polycrylic.

I love this Re-purpose It project because it gives these old unwanted items a new life! Talk about ‘Going Green,’ I think Re-purposing old items is the ultimate way to ‘Go Green.’ The various shapes and details on each knife really makes for such a wonderful variety.

Dinner knives work perfectly for these Garden Stakes because the knife end holds really well into the ground. Hope you feel inspired today!

Laugh Today

Laugh Today

I thought I’d start the week off with something to make you Laugh Today. Matt and I recently took a trip down to St. Louis with some college friends to visit other friends. We stopped at this gas station in the middle of nowhere and saw this sign on the side of the gas station. Now I love the south. I mean I have a lot of family that lives there, but I just had to laugh at this one. We decided this was one of those…”You know you’re in the south when…”

We thought it was great that this gas station not only serves Champs Chicken, hot pretzels and chili, but just in case you had a craving during your long drive you can also purchase gizzards, liver and catfish while you your pump gas here. Sorry, I can’t remember exactly where this station is, so you’ll just have to find somewhere else to buy your gizzards, liver, and catfish along the highway! LOL!

Fabulous Spaces: Shelly & Andy’s Urban Revival

Fabulous Spaces: Shelly & Andy’s Urban Revival

Today I’m featuring the home of some of my closest friends, Shelly and Andy. Shelly and I were room mates in college and are still best buds. Shelly and Andy have their own wedding photography business and Andy is an electrician, so needless to say they have a perfect balance of creativity and the know-how to really create a beautiful home. They’ve added their own personality and design style to their home while really respecting the historic nature of the space. They’ve done and are continuing to do a lot of work on their home themselves. With its southern urban charm Shelly and Andy’s home is a real beauty.

Meet Shelly & Andy with the rest of their family Colby (the little black poodle) and Norman (the adopted gray alley cat). They all currently reside in this mid 19th century row house in the area called South City in St. Louis. They moved into this historic beauty, built by a Civil War doctor, in this up and coming area of the city a couple years ago.

We’ll start with the exterior of their home. Upon approaching the front of their home this beautiful magnolia tree greets with a certain southern charm. These bright blossoms always remind me of the movie Steel Magnolias. I guess that’s why I always think southern charm when seeing them.

When walking to their front door the details of their home really start to make a bold impression. The brick archway opens to a covered entrance boldly displaying this is the entrance to the home.

This brickwork is definitely from a time past. The design, care and attention given to these beautiful details is something very rarely seen in homes built today. The magic is really in the details in these historic homes.

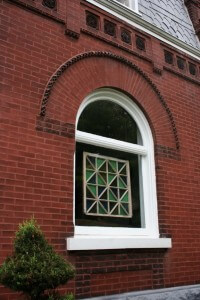
The doorway is not the only emphasis on the front elevation. This large window is built with a carefully crafted brick arch surround giving it both prominence and unity across the front of the home.

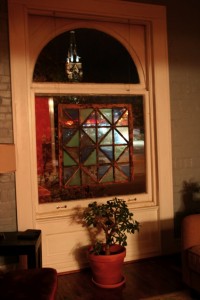
The simple stained glass piece hung in the window adds an updated touch of texture and color. It also provides some privacy for the living room from the street view without having to add draperies to the interior space.

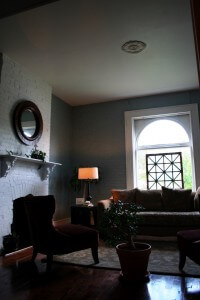
The tall ceilings are an added benefit of this 19th century home, making each room feel even larger. Traditional details like the casings and mantle stand in wonderful contrast to the updated furnishings with whimsical fabrics and a variety of textures.

The brick from the fireplace carries over to the the adjacent walls adding scale and texture to the great height of the walls.

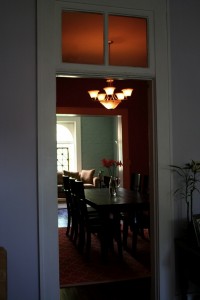
The transoms over the door ways are another element that helps to break down the scale of the tall ceilings and allow light to be borrowed from room to room.

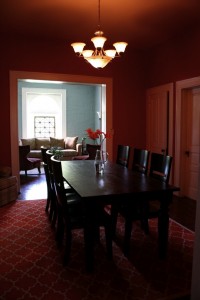
Shelly and Andy have added a little modern twist to the very traditional spaces in their home by selecting bold colors like these bright red walls in the dining room. The moroccan patterned rug and the rustic table and chairs with a more modern silhouette add a little cultural flair to the space.

The stairway in Shelly and Andy’s home is off the kitchen and although its a steep flight, the stained wood stairs and rail stand in nice contrast to the white beadboard on the wall.

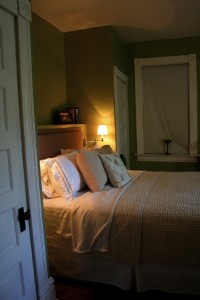
Shelly and Andy have pulled together their master bedroom with a serene Spring green color on the walls. With no room for end tables with lamps because of the symmetrically flanking closets, Andy wired some adjustable wall sconces. A great solution and the ability for them to adjust and move around makes for great reading lights. A team effort, Shelly and Andy made their upholstered headboard themselves as well.

They’ve pulled together the space by letting the green walls stand as the main color in the room and selecting all neutral colored bedding with varying textures that really make the space look warm and rich.

Although the fireplace in the bedroom is not functioning, it adds a nice focal point on the main wall seen when entering the bedroom. Above the mantle is a beautifully over sized print of Shelly and Andy’s wedding photo. I love the large scale of the print with an elegant matte and frame.

I hope this tour through Shelly and Andy’s Urban Revival inspires you to add your own personal style and taste to complement your home’s architecture. Thanks to Shelly and Andy for sharing their lovely home with us as well! Have a great weekend!

Clever Throw Pillows

Clever Throw Pillows

Over the last year I have continued to see and been enamored by throw pillows I’ve seen in home stores and magazines. Their beautifully patterned prints and various textured fabrics really make even the dullest of sofas really pop. I think of throw pillows like the special spice that really makes a recipe zing. They can just add so much.

My dilemma: I’m always attracted to the most expensive throw pillows. I like rich fabrics and expensive designer prints, but don’t have the budget to add them to my own living room.
I kept thinking “why don’t I just buy some fabric and make my own throw pillows?” I searched around online for fabrics that caught my attention, but again I seemed to like the fabrics that cost upwards of $40/ yard or even more. Again, out of my budget…I’m really frugal and sometimes just cheap.

My solution: One day I was walking through World Market and saw they had a clearance section of cloth napkins and cloth placemats and the light bulb went off! I loved the fabrics and prints and they were already the size of throw pillows. There was a nice blend solids and prints that coordinated well. At $1 to $3 each I decided I had nothing to lose.
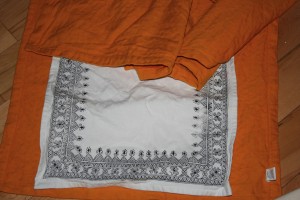
And my quest to turn these remnant cloth napkins and placemats into throw pillows began!

I wanted to make the throw pillow covers have a removable pillow insert so I could wash them. So, the only other thing I needed to buy was pillow stuffing and fabric for the insert pillows. I stopped by the craft store and a bag of pillow stuffing was anywhere from approximately $15 to $25. And I thought, yeah right…there has to be a cheaper way to make a pillow. And I found one. For $2 to $3 each I bought bed pillows from Walmart. Not only did I have my pillow stuffing, but also my cloth for the pillow inserts.

So, here’s how I made my throw pillows and how you can make yours as well!

In addition to the fabric (napkins or placemats) and cheap pillows to pull apart for the stuffing and fabric,
you’ll need a sewing machine, thread, pins, fabric scissors, and upholstery needle for your sewing machine (which I’d highly recommend using because when I used regular sized needles for my machine I broke 2 needles trying to make it work. Invest in the upholstery needles).
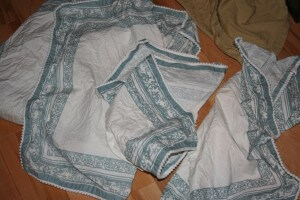
1. Wash the cloth napkins or cloth placemats first. This is really important as most of the fabrics will shrink a little and some more than others.

2. Find which fabric you want for the front of the pillow and which you want for the back. I suggest you use the napkin or placemat to its full size (don’t fold it down to fit the backing fabric). The backing fabric needs to be a little larger than the front fabric.

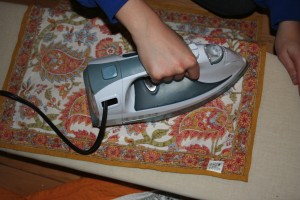
3. Iron both pieces of fabric (check the tags’ care directions first).
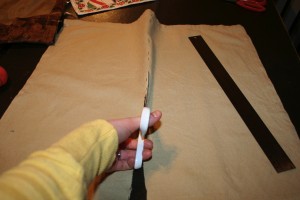
4. Using fabric scissors, cut the backing fabric in half where you want the opening for the pillow insert to be.
5. Pin back the un-hemmed edges you just cut and sew along those edges to finish them.
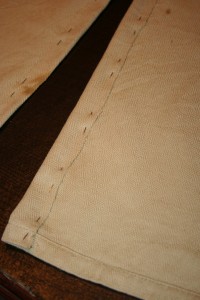
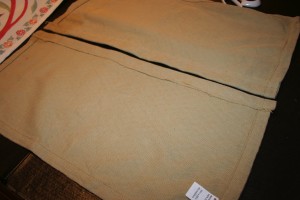
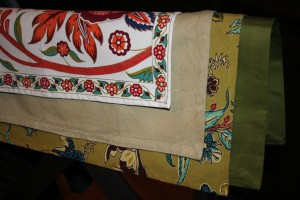
6. Line up outer edges of fabric, using the front fabric as a guide and starting in one corner. See photo below. Pin one of the short edges of the front and back face together, print sides out. And sew short sides of fabric together, on the inside of the fabrics edge.
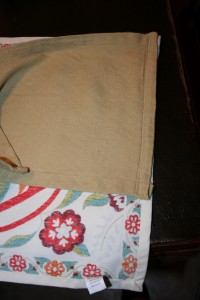
7. Pin the long side of both pieces of fabric together. Then fold under the backside fabric on the short end to align with the end of the front fabric, pulling taught, and pin along this edge. Sew along these edges on the inside of the finished edges of the fabrics. See photo below.
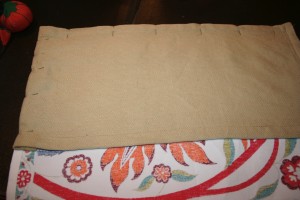
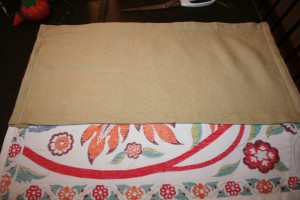
8. Repeat steps 6 and 7 with the other piece of backing fabric, overlapping the middle edges by at least 1 1/2″.
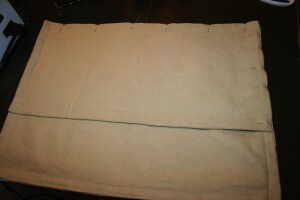
9. Create insert pillow by sewing two pieces of fabric together face sides in on three sides and half of the 4th side. Turn the fabric face side out. Stuff the pillow. The hand stitch the remaining opening.

10. Stuff the insert pillow into the pillow case and voila!
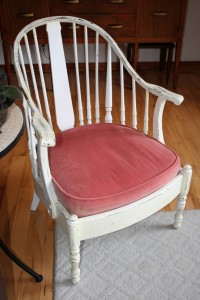
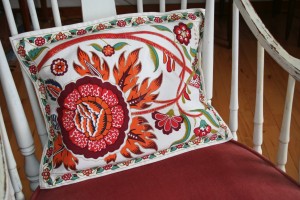
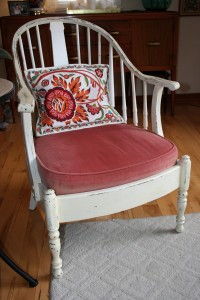
You’ve created a beautiful throw pillow that will turn a nice chair into a “Oh, what a cute chair”!
Allergen Free Cupcake Tasting

Allergen Free Cupcake Tasting

Who doesn’t love cupcakes? I know I do. Well, today I had the privilege to take part in an allergen free cupcake tasting.

A friend of mine, Cheyne (pronounced Shane), is a cake artist who is just beginning to launch an allergen free line of cupcakes. Cheyne turned his passion for creating beautifully sculpted cakes into his business called Compelling Cakes. He not only creates beautiful occasion cakes, but bakes delicious cupcakes, or so I heard from everyone else because I could never eat them.

After telling him my personal frustration and disappointment of finding gluten free baked goods that contain eggs and dairy (other top allergens) at local bakeries, he decided to create an allergen free line that both me and another allergen free friend could both eat. He’s been working hard at perfected his allergen free line of cupcakes and his hard work has paid off.

Cheyne held his first allergen free cupcake tasting earlier this afternoon at Cafe Firefly in downtown Algonquin (IL), where Cheyne’s cupcakes and other baked goods can be found. He invited the local allergen free crowd to sample his cupcakes and can I just say….yummm!

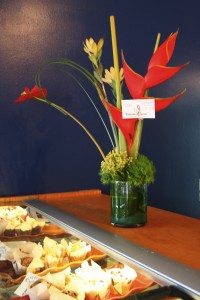
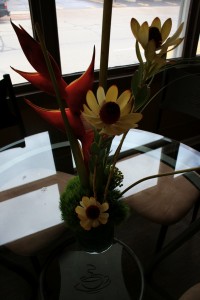
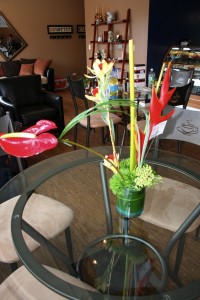
I just had to share this beautiful arrangement that John Regan of Twisted Stem Floral in Crystal Lake sent along to Cheyne to congratulate him on his new line of cupcakes and to have in the cafe for the tasting. Its a gorgeous arrangement and looks great on the cafe’s counter. Great addition to the tasting; I just love flowers!

At the tasting I got to sample Cheyne’s allergen free chocolate cupcake, salted caramel cupcake, and chocolate bourbon cupcake. It was a delicious afternoon! The cupcakes were actually moist, light and fluffy and the icing was smooth and sweet. Texture is always difficult with allergen free baked goods, but Cheyne nailed it. I’m so excited to be able to actually go to a coffee shop and buy a cupcake! Another simple joy added back into my life.


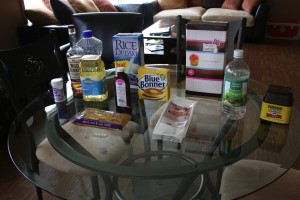
At the tasting Cheyne had all the ingredients out that he used for the cupcakes, just in case there were any questions. Great idea when you’re baking for people with food allergies.

His allergen free cupcakes will be for sale really soon, so make sure to follow him on Facebook (Compelling Cakes) to stay tuned. Or stop in to Cafe Firefly to check out the regular cupcakes he has available right now.

Even better, if you’re in the area (Algonquin, IL) next week you can take part in the second allergen free cupcake tasting he’s having. The tasting will be held next Tuesday, March 28th at 10 am at Cafe Firefly . Please let Cheyne know if you plan to come by dropping him a line on his Facebook page, Compelling Cakes. Thanks to Cheyne for the tasty allergen free cupcakes this afternoon. As a part of the allergen free community thank you, thank you for giving all of us another option!

*Compelling Cakes allergen free cupcake line stays away from gluten, eggs, and dairy. Please follow up with Cheyne at Compelling Cakes on Facebook for more details.

Sweet Cupcake Beauties

Sweet Cupcake Beauties


I visited my sis, Sara, over the weekend and she’s been showing me some of the adorable cupcakes she’s been making. They’re so clever I thought I just had to share them with you. She’s been baking them following this cupcake cookbook called What’s New Cupcake? by Karen Tack and Alan Richardson. It has some really cute ideas for the most adorable cupcakes for any occasion. And these are definitely Kid Friendly, as the book has some wonderful ideas for cupcakes for kids’ birthday parties.


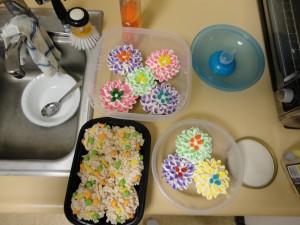
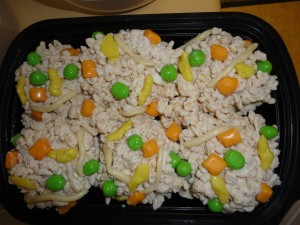
(Above Photo) Sara made these cupcakes for her boyfriend, as a special treat as they love to eat Chinese food together. These 6 cupcakes are put together in a pan to look like fried rice. The cupackes are topped with rice crispy treats and the veggies in the fried rice are mutlicolor Tootsie Rolls cut up. These would make a great gift for your Chinese-food-loving friends and would be adorable given in a Chinese food box.

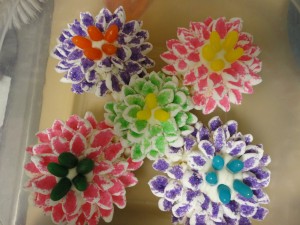
(Above Photo) What a great way to welcome Spring with these colorful flower cupcakes. These beautiful flower cupcakes’ petals are made with miniature marshmallows cut in half and dipped in various color sprinkles with icing and jelly beans at the center. These little flowers would be a great Spring hostess gift, given in a basket with a layer of colorful cloth napkins underneath.

Try making these cupcakes allergen free. It will require quite a bit of replacement, but…hello…even those of us who can’t eat gluten, eggs, and dairy crave cupcakes.

Here’s how to make these tasty cupcakes allergen free:
Cupcake- I suggest just buying a mix like Hodgson Mills gluten free yellow cake mix
Eggs- Ener-G Egg Replacer
Dairy- Use whatever dairy substitute you can use (almond milk, rice milk, etc.)
Icing- Try Pamela’s Products gluten free icing mix

Thanks, sis, for the beautiful inspiration! Keep up the creative baking!

Spring Baby Shower Decor

Spring Baby Shower Decor

As promised earlier this week, here are the pics from Baby Shower last weekend that I did the decor for (with lots of help from friends may I add). I searched around the craft store for about an hour trying to find the perfect thing. Again, it had to be not “babyie” it needed to look fresh and welcoming and be gender neutral. We didn’t want to spend a bundle on decor, but wanted it to be really special. So, here is how it all came together.

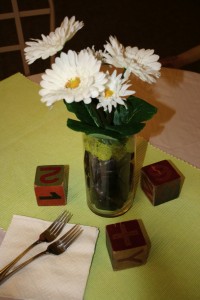
Five of the table had the center piece shown above. A small bunch of silk daisies, in a clear cylinder vase filled with natural stones and green moss. A friend had a bunch of the antique baby blocks that added a beautiful touch to each table.

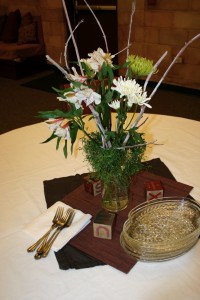
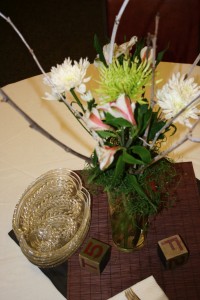
For 2 of the centerpieces I bought 2 bunches of fresh flowers (one for each vase) and had these twigs I painted white for a winter centerpiece. I placed them together in taller clear cylinder vases and stuffed a little green spanish moss to pour out of the top (holding the stems all in place).

Earthy and simple!

The diaper cake was elegantly placed on a cake stand with a clear plater on top (nice touch June) on the gift table!

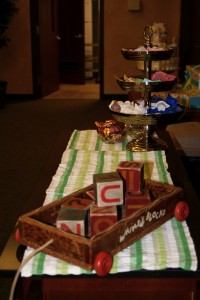
On the drink table sat an antique baby wagon with more of the antique baby blocks, a colorful runner (really placemats we pulled together), and a 3 tiered stand with chocolates and coffee accessories.

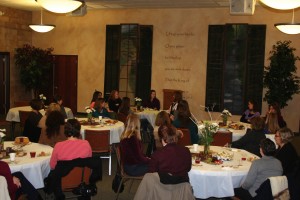
Eating, chatting, laughing, and loving on the mom-to-be!

A great time celebrating a wonderful blessing in life! Great job ladies for pulling off a wonderful shower! Only a month until we’ll all get to meet the new little one!