Category Archives: Healthy Living

Kid Friendly Tacos

Kid Friendly Tacos

As an adult who has a fairly restricted diet, I can’t imagine being a kid or having a child that has food restriction…having to always tell your child “no” or “you can’t eat that.”
That’s why I’m launching this new segment called Kid Friendly Food, where I’ll post recipes that’ll give you more opportunities to tell your child on a restricted diet “Yes, you can have that.”

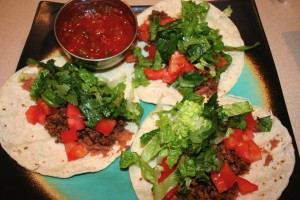
Although Matt and I eat pretty healthy, that doesn’t mean we both don’t crave junk food. In fact we passed a Taco Bell the other day and both missed those tasty tacos we once ate. So, I thought we can make those tasty tacos at home and I’ll be able to eat them. So, here are our tacos!

The taco seasoning packets you buy at the supermarket most of the time contain wheat, so Matt and I make our own seasoning in this large batch and keep it on hand, so its ready whenever we want to make tacos.
Here’s the Taco Seasoning we make:
1 tablespoon chili powder
1/4 teaspoon garlic powder
1/4 teaspoon onion powder
1/4 teaspoon crushed red pepper flakes
1/4 teaspoon dried oregano
1/2 teaspoon paprika
1 1/2 teaspoons ground cumin
1 teaspoon sea salt
1 teaspoon black pepper

My Taco Ingredients:
Ground Beef
Vegetarian Re-fried beans (I like them because they add a heartiness to the tacos since I can’t eat cheese. Add them first without telling your child and see if they’ll eat them. They may not even notice.)
Chopped Tomatoes
Chopped Lettuce
Chopped Cilantro
Premade salsa
Corn Tortillas
Corn chips (to eat with tacos)

Kid Friendly Taco Directions:
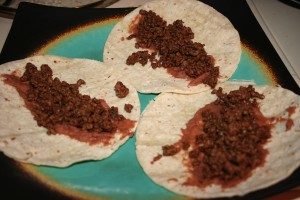
1. Sautee ground beef, turkey, or chicken in a pan over medium heat, sprinkling with a little taco seasoning. Drain meat.
2. Heat corn tortillas in microwave or in a pan on stove.
3. Heat re-fried beans in pot on stove.
4. Spread a little re-fried beans on tortilla. Add meat, then tomatoes, lettuce, and chopped cilantro.
5. Serve with salsa and corn chips and enjoy!

Next time your child on a restricted diet sees a Taco Bell and like me and Matt says “that looks good” and wants tacos, you can tell them “Yes, you can have that!”
*Note: if corn is not in your diet, you can use large lettuce leaves for the tortilla. Try Boston Lettuce or Iceberg Lettuce. It may be weird at first, but you’ll get used to it.
Closer Look: Salmon

Closer Look: Salmon

Today I’m taking a Closer Look at one of my favorite proteins: Salmon. There’s so many ways to prepare it to enhance its natural flavor and it has great nutritional benefits.

Why eat salmon?
Salmon has an extremely high amount of protein. Its a great source of omega-3 fatty acids, vitamins A, E, folate, and B vitamins. Salmon is rich in minerals such as calcium, magnesium, phosphorus, potassium, and selenium. www.nutritiondata.self.com/facts/finfish-and-shellfish-products/4104/2

How to select salmon?
I buy wild caught salmon whenever possible. Even if its frozen, wild caught fish is always better than farm raised fish because the fish has been eating what it naturally eats in the wild rather than whatever the farms decide to feed the fish. Thus the nutritional value to you is much better. Look for a fillet that is dark pink or red in color. But, be careful because I’ve seen that a lot of stores carry salmon that has been dyed red to make it look better (check the label and make sure there are no dyes listed in the ingredients).

I love to experiment to find new ways to cook salmon and here’s one of the simplest, yet delicious ways to cook it.

Ingredients:
Salmon Fillets
Extra Virgin Olive Oil
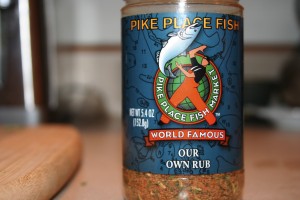
Pike Place Fish Rub (or other prepared herb rub for fish; supermarkets carry various types)
*This Pike Place Fish Rub is simply a blend of brown sugar, paprika, cilantro, garlic, pepper, onion, salt, and other spices.

Directions:
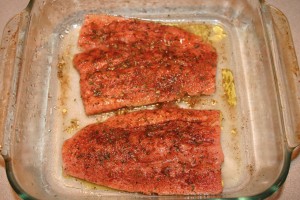
1. Rub fish fillets lightly with olive oil.
2. Sprinkle herb rub over fish fillets and pat into fillets. (Be careful if your rub contains salt not to add too much of the rub)
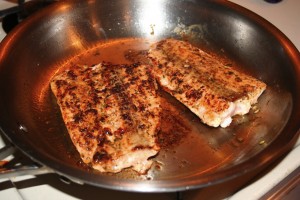
3. Heat some olive oil in a pan over medium heat. Add fillets and sautee until the outside of the fillet is slightly browned; flip fillet and sautee until the other side is slightly browned and center of fillet is just cooked. Serve!
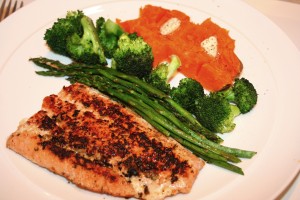
*I served my herb rubbed salmon with half a baked sweet potato with butter and oven roasted asparagus and broccoli.

Quick Valentine’s Dessert

Quick Valentine’s Dessert

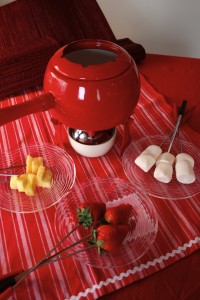
Just in case you forgot, today is Valentine’s Day. So, you have no idea what sort of dessert you can have on a restricted diet or with limited time to make it…How about chocolate fondu!

Even with my restricted diet, chocolate fondu is a great no bake dessert that I can eat.

The best part about chocolate fondu for Valentine’s Day is its a fun activity that you can share with your loved one!

Here’s how I make my chocolate fondu:
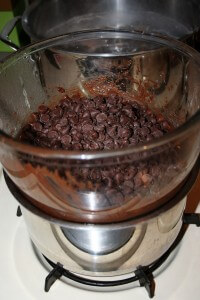
I take a package of allergen-free semi sweet chocolate chips and melt them down in a double broiler. I swirl in a little water and a touch of vanilla extract; stir thoroughly and pour into your fondu pot with a candle or sterno lighter below.

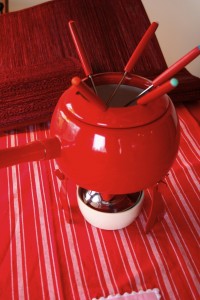
I found this cute little fondu pot at a thrift store several years ago…the red color makes it feel even more festive!

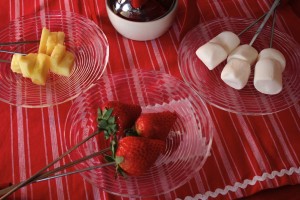
My favorite fondu dippers that follow my restricted diet:
Strawberries
Pineapple
Marshmallows
GF Animal Crackers
GF Graham Crackers
GF Pretzels
Bananas (I can’t eat em’ any more but used to be my favorite dipper)

Even with not much time to prepare and even on a restricted diet, you can enjoy this delicious dessert/activity with your loved one. Happy Valentine’s Day!

Homemade Pizza Crust You’ll Love

Homemade Pizza Crust You’ll Love

I don’t know about you, but Friday nights at my family’s house growing up was “Pizza Night!” And it was everybody’s favorite.

One of the things I hear people say when they have to go Gluten Free, with head hung low in the most sad voice I’ve ever heard is, “I can’t eat pizza anymore!”(Note: Keep reading even if you aren’t GF because this is a great recipe that’ll even give regular pizza crust a run for its money)

I’m here to tell you that despite the fact that you can’t eat Gluten, Dairy, or Eggs that you can eat Pizza! I know if you’re on a restricted diet, you’re singing “Oh, Happy Day!” You can buy premade GF pizza crust mixes and I’m sure there are some that are really tasty and I’m all for the convenience factor. But, this is one well worth making from scratch. It’s become my favorite and Matt loves it too, even though he can eat “regular pizza.”

This Quick-Bread Pizza Crust recipe is from one of my favorite Allergen Free Cookbooks.
It’s called Cooking Free, by Carol Fenster, Ph.D.

* I generally double the crust recipe. And making this pizza generally becomes not only dinner for us, but we make a night activity out of it, making the pizza then watching a movie while enjoying!

Ingredients:
1/2 cup cornstarch
1/2 cup tapioca flour (I use Bob’s Red Mill or Ener-G brand)
1 teaspoon sugar or honey
1 teaspoon xanthan gum (I use Bob’s Red Mill brand)
1/2 teaspoon salt
1/4 teaspoon potato flour, or sweet sorghum flour, or brown rice flour (I use whatever I have on hand)
1 teaspoon baking powder
1/2 teaspoon onion powder
1/2 teaspoon dried rosemary
1/2 teaspoon Italian seasoning
2 tablespoons butter or margarine
1 large egg, or 1 tablespoon egg replacer powder mixed in 3 tablespoons water
1/4 cup milk (cow, rice, soy)
Extra rice flour

*A lot of ingredients, but this one is well worth it!

Directions:
1. Preheat oven to 400 degrees. Grease 12 inch nonstick pizza pan (for a thin, crispy crust) or 11×17 inch nonstick baking pan or 10 inch cast iron skillet (for a deep-dish crust).
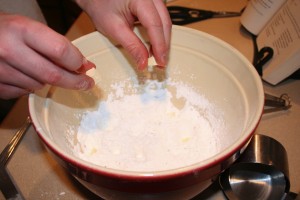
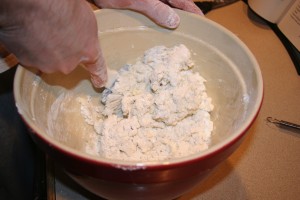
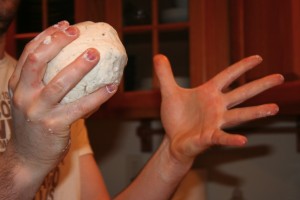
2. Combine all ingredients except egg, milk, and extra rice flour. I cut up the butter into small cubes and mix with a spatula or my hands. Bled until mixture resembles fine bread crumbs. Add egg and milk and mix until dough forms balls. Dough will be stiff, but sticky.


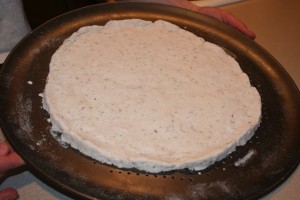
3. Place dough on prepared pan and sprinkle with extra rice flour. Pat dough to 1/4 inch thickness with hands, just up to edges of pan (sprinkling with more rice flour as needed). Make dough slightly higher around outer edge to contain toppings. Bake for 10-15 minutes. Remove from oven and top with toppings. Bake for an additional 10-15 minutes, or until browned to taste.

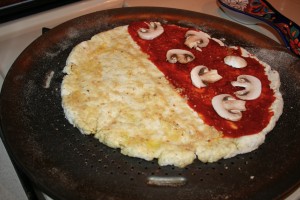
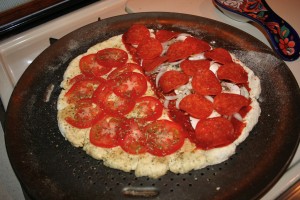
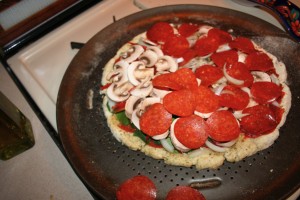
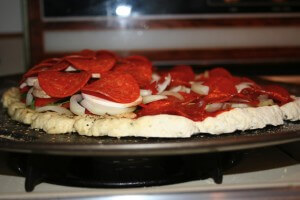
(Watch the pizza develop, the right side is Matt’s and the left side is mine)

Ideas to top the perfect Allergen Free Pizza:

First layer> Base: You have to have some sort of base for your pizza. You can use pizza sauce or use (what’s become my favorite) blend olive oil and minced garlic and spread that on as a base. (The olive oil and garlic base is perfect for those who cannot tolerate tomatoes). If you can tolerate tomatoes, add a layer of sliced tomatoes on top of the olive oil garlic blend.

Second layer> Spices and Greens: Next, I like to sprinkle on Italian seasoning or fresh basil leaves. I sometimes add spinach leaves too.

Third layer> Veggies: I then add all the veggies. There are so many different combos you can use. I use what I have in my fridge. Sliced mushrooms, onions, peppers, artichoke hearts, broccoli, whatever else you love!

Last layer> Proteins: Last, I add the proteins. If you can eat cheese that’s an obvious topping. If you’re like me and can’t do dairy you could use a replacement cheese like Diayla brand from Whole Foods. You could also use a little goat cheese (use it more sparingly than regular cheese, as it tends to be strong).
Or you can do what I do and go without cheese. This crust has a great taste that compliments pizza without cheese as the onion powder and other spices provide a lot of flavor.
As far as meats go you can add my favorite GF pepperonies (I use Boar’s Head brand), or GF Italian sausage. If you can’t do processed meats precook chicken, shred it and use it as a topping.

(As you can see above, I like a lot more toppings on my pizza than Matt does!)

This pizza is great as leftovers, heated in the toaster oven!
Hope you and your family can have your pizza night, despite any food allergies! Enjoy!

Closer Look: Asparagus

Closer Look: Asparagus

Today I’m taking a Closer Look at Asparagus. Maybe you love it, or maybe you’ve hated it in the past.
Regardless, I hope you’ll try this delicious little veggie.

Asparagus is in season in early Spring. You may be thinking that it’s far from Spring, but I’ve begun to see it pop up in the supermarkets, looking really fresh and priced really reasonably.

How do you choose the best Asparagus?
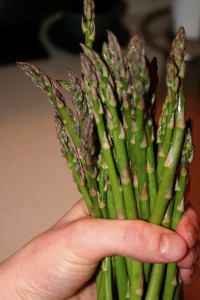
Look for thin stalks. Our American mindset generally defaults to bigger is better, but not when it comes to Asparagus. The thinner stalks have a better flavor than the thicker stalks. They should be bright green in color and should look perky and fresh, not saggy and rubbery.

What are the nutritional benefits of eating Asparagus?
Asparagus is a great source of vitamins A, C, K, and folate. Its low in carbohydrates and actually contains a significant amount of protein and fiber as well. www.nutritiondata.self.com/facts/vegetables-and-vegetable-products/2316/2

How do I cook Asparagus?
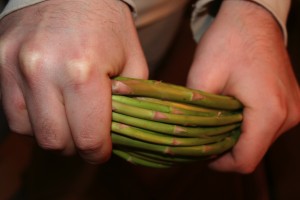
Regardless if you boil, sautee, or roast it, start by washing Asparagus in cold water. Hold the stalks with one hand on each end and bend the stalks until they break. Use the top half of the stalks and toss the lower half (I sometimes save these lower halves of the stalks and use them for Asparagus Soup; I’ll post that recipe at a later date). The point where these stalks naturally break separates the undesirable portion to eat from the naturally tasty potion.

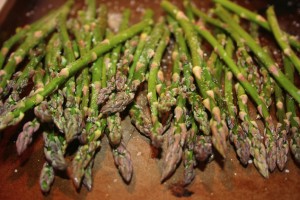
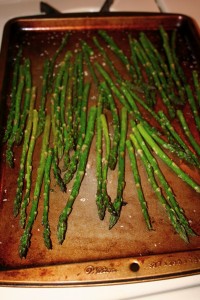
My favorite way to prepare Asparagus is to roast it in the oven. I preheat my oven to 400 degrees. I place the stalks on a cookie sheet and drizzle a little extra virgin olive oil, adding a little sea salt and pepper to taste; Toss to coat. I then spread the stalks so they’re a single layer on the pan and then roast them for 5 minutes in the oven. Cooking them at this high temperature for a short amount of time still leaves them bright green and crisp while making the tops a little crunchy.

What do I serve with Asparagus?
My favorite thing to eat with Asparagus is fish and sweet potatoes. The flavors just seem to work really well together.

Hope you’ll give this Spring veggie a try! Its become one of my favorite veggies!

Breakfast on a Restricted Diet

Breakfast on a Restricted Diet

One of my biggest challenges with my restricted diet has been what to eat for breakfast. Since I don’t eat gluten, dairy, or eggs (the main ingredients in breakfast foods) breakfast has been a challenge. But, I have some ideas…

I like to mix gluten free cereals.

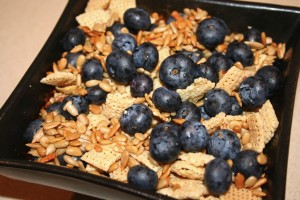
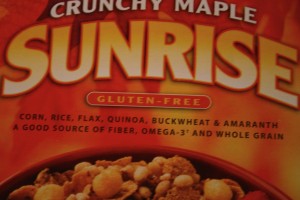
I combine this sweet GF cereal (Sunrise Maple Crunch) with a more bland cereal like GF Chex. It helps vary the flavor as you eat it and the Chex is a lot less expensive so it makes the more expensive GF cereal go further.

I like to get some protein in the morning, so I generally add unsalted sunflower seeds. They add an extra crunch and 1 oz. of sunflowers seeds contains 6 grams of protein and 2 grams of fiber. I then top the cereal with blueberries (when available) and rice milk.

Hope this gives you a start to a great breakfast even on a restricted diet!

Have a great weekend. I’ll see you on Monday! Happy Super Bowl!

Baby Shower Details

Baby Shower Details

Earlier this week I featured a diaper cake that I made for a baby shower I helped throw last weekend. I feel like I keep running across more and more pregnant ladies due this Spring. So, I thought you may enjoy seeing some of the details for this Baby Shower to give you some ideas for a Baby Shower you may be throwing in the near future! No paper streamers or heavily frosted cakes here…Check it out!

Above you can see the diaper cake as a decoration on the central coffee table.

I loved this chair layout for the Baby Shower. The mom-to-be got a big comfy chair to sit in with all the ladies’ chairs surrounding, so they could easily see the gift opening. The coffee table and rug in the center helped the space to feel more intimate, anchoring all the seats into one seating area.

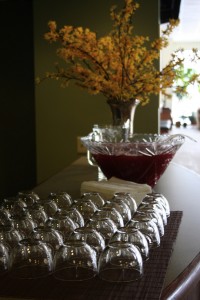
Forget the plastic cups and plates, we used a classic cut glass punch bowl and traditional punch glasses. We (the four of us who threw the shower) decided we had these great items at our disposal and didn’t mind washing dishes if it meant using these beautiful pieces. Back to the classic entertaining pieces…yeahhh!

We really used minimal decor for the Baby Shower, but it really turned out beautiful. Since Cheri, the mom-to-be, is having a boy and her nursery theme is nautical, we tied all the decor at the shower together with a color palette that reflects that: Blue (more turquoise), Yellows, and White.

Above you can see the food table with a simple yellowish gold linen and a large turquoise vase filled with flowers in yellows and white with large winding stems to give it a little earthy flair.

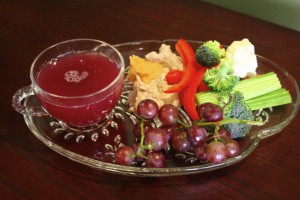
Because we kept the food really simple we used varying height stands and trays for displaying the food to giving the table a rich appeal. We kept the food really simple with fresh fruits and a veggie tray with 3 different kinds of hummus, 2 trays of miniature quiches, and brownie and cookie bars. No heavily frosted cake here…every shower I’ve been to, it never seems to really get eaten (ladies seem to not like the heavy icing).

We had the privilege of using the beautiful traditional appetizer plates that have a ring to hold the punch glasses. They’re not only beautiful, but so practical. They allow you to hold your plate of food and punch glass with one hand, while chatting and eating at the same time. Love these!

I love using what I have and Re-Purpose It in order to decorate. These little turquoise vases are actually votive candle holders. I just loved the color and thought they’d be perfect for the event. So, I purchased one bunch of simple white fresh flowers and cut them to fit in these little “vases.” We set these little arrangements around on some taller bistro tables and next to the diaper cake on the coffee table. They’re small, but really added a pop!

As a host of a shower I think its important to have a clearly designated space for people to put their gifts for the mom-to-be. I think the best way to designate the gift drop spot is to place a table near where the guests will enter and designate “this is where gifts go” by simply placing one gift there. People will get the idea and then you won’t have to answer 20 questions of “where should I put my gift.” We just simply moved the table to the gathering area when it was time to open gifts.

This Baby Shower was a great time. I hope you feel inspired for your next event to think beyond the paper streamers and heavily frosted cakes! Let your creative mind run wild!

The mom-to-be and each of us hosting got to take home a small bunch of flowers from the shower to put into bud vases at home. I put mine in this beautiful bud vase that was a wedding gift from my sis. Its been really nice to have fresh flowers in my home this week…A preview of Spring!

Slow Cooker Chicken with Italian Sausage

Slow Cooker Chicken with Italian Sausage

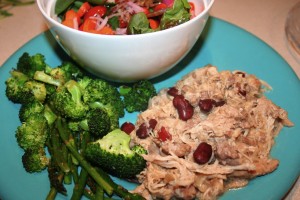
Because its still freezing cold around much of the country today, I thought I’d share a warm, hearty slow cooker recipe with you. I served this Slow Cooker Chicken with Italian Sausage with oven roasted broccoli and asparagus and a side salad. It makes great left overs too. Talk about comfort food on a restricted diet…well, here you go!

Ingredients:
10 oz. mild or hot Italian Sausage (GF), casings removed
5 or 6 boneless skinless chicken thighs
1 can (15 oz.) great northern beans, rinsed and drained
1 can (15 oz.) kidney beans, rinsed and drained
1 cup (GF) chicken broth
1 medium onion, chopped
1 teaspoon black pepper
1/2 teaspoon salt
Chopped fresh parsley (serve on top)

Directions:
1. Brown sausage in large skillet over medium-high heat, stirring to separate; drain fat. Spoon into slow cooker.
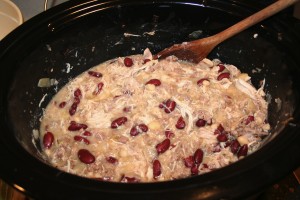
2. Trim fat from chicken. Place chicken, beans, broth, onion, pepper and salt in slow cooker. Cover; cook on LOW 5 to 6 hours.
3. Adjust seasonings, if desired. Chicken should be tender and fall apart as you stir (I like it to a shredded consistency). Garnish with parsley as desired.

* Recipe Source: Rival Crock Pot Slow Cooker Recipes

Super Bowl Bash

Super Bowl Bash

Those who know me know that I’m really not that interested in football unless the Colts are playing (I’m a Hoosier down to the bone). The only thing that really gets me excited about football or the Super Bowl is the social aspect, a Super Bowl Party! I saw these awesome ideas to “Deck Out Your Super Bowl Bash” on the Today Show this morning and thought I’d share.

Hope this video will give you some great ideas to Deck Out Your Super Bowl Bash this year! There’s still time, so get going!
Click on the video below to check it out.

I love these party decor ideas because they’re a little more classy than your typical paper streamers in your team’s favorite colors. They use serving dishes you already have and stuff you can pick up at the grocery or hardware store. But my favorite aspect of this decor is that much of it you can eat. Hope your Super Bowl Bash will be a little extra special this year!

Closer Look: Loose Leaf Teas

Closer Look: Loose Leaf Teas

I thought I’d share something today that’ll warm you right up during this cold winter weather!
Today I’m taking a Closer Look at Loose Leaf Teas.
I fell in love with loose leaf teas a few years ago. They taste so much better than bagged teas and have healing properties as well.
I wanted to share my love of these teas with you by introducing you to my loose leaf tea source.

I met Lauren Heller, a friend of a friend, who owns her own loose leaf tea business called Our SpecialTEA . She is a wealth of knowledge on the subject and that’s why today I’m sharing an interview I did with Lauren on Loose Leaf Teas.
So, if you love tea, have never liked tea in the past, are interested in what loose leaf tea is, or interested in the healing properties keep reading. You can check out Lauren’s Loose Leaf Teas at: www.ourspecialtea.com/

Q: Lauren, how is loose leaf tea different than tea I could buy at the grocery in tea bags?
A: Lauren: “The tea bags that are available today are much different than the ones from even 3 years ago. The newest trend are tea pyramids and larger type filter bags for larger leaves. These types of tea “bags” are much better than your traditional tea bag. Tea bags are typically made from the “dust” of the picked tea crop. Company’s such as ours receive the top of the picking which are full, bright, fresh leaves and tea bags are made from the dust and broken pieces that fall to the bottom. The tea bags will also brew a much more heavy and harsher tea taste.”

Q: What are the different types of teas?
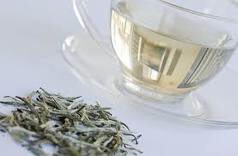
A: Lauren: “You can go greatly in depth with this question but the basics that the United States are familiar with are: Green, White, Black, Herbal (Tisane), Oolong and Rooibos. The difference is based upon processing techniques; wilting, firing, drying, etc.”

Q: What are the health benefits of loose leaf teas?
A: Lauren: “Where to begin??? If you go to our site www.ourspecialtea.com/Loose_leaf_teas.html you will find a lengthy section that pertains to the limited explanation of health benefits.”

Q: I know you have young children and use the loose leaf teas to treat a lot of ailments. What are some ailments that you treat with loose leaf teas?
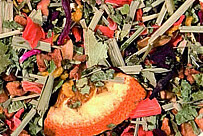
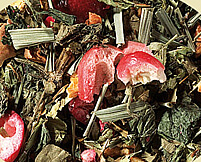
A: Lauren: “A big treatment in our house is for cold or fever. I use a lot of peppermint leaf for fevers because it naturally cools the body. It also is wonderful for opening up the lungs and air passages. Some of my other favorites are our Chamomile Anthem (blend of Peppermint, Rooibos and Chamomile), Citrus Splash Wellness (all herbal mix with lots of citrus fruits, full of vitamins) and White teas…they are full of antioxidants.”

Q: What’s your personal favorite of all the teas?
A: Lauren: “My personal favorite category is Oolong. I love that an Oolong brews such a beautiful amber-like color. It’s taste is subtle yet holds its own. It is a nice balance between a Black tea and white/green tea. They offer such incredible health benefits as well.”

Q: If someone says they generally don’t drink tea, what is one loose leaf tea you think they may like?
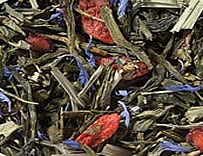
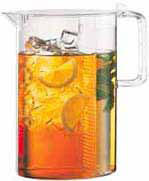
A: Lauren: “I first ask people what they have tried. If it was grandma’s sun tea or tea from a restaurant, I like to suggest that they try something that doesn’t have such a harsh, “tea” taste from the tannins in the tea being steeped improperly. I would suggest an herbal or Rooibos. But if you have a good source of loose tea, and it is brewed properly, all the teas taste wonderful. Even to the pickiest of pallets.”

Q: What’s you favorite sweetener to add to tea?
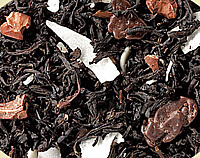
A: Lauren: “I typically don’t add sweetener to my tea because I like to get the full flavor of the tea in its “naked” form but if I do, I make sure it is natural. So I choose either an organic sugar, raw sugar, honey or agave nectar. I do enjoy a good strong black tea and add just a touch of organic soy creamer. Tastes amazing!”

A special thanks to Lauren Heller for sharing her wealth of knowledge with us!

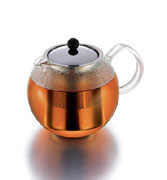
I wanted to share that I generally brew my loose leaf tea in a tea strainer like the one shown above. My personal favorite of all the teas are the Rooibos Teas. I find they really relieve my allergy and asthma symptoms even on days when allergy medicine doesn’t seem to work (and trust me the bagged Rooibos Tea just does not work the same).

You can find out more information about Loose Leaf Teas and purchase the teas and accessories from Our SpecialTEA online.
They really make great gifts! Drink up!