Category Archives: Miscellaneous

Clever Throw Pillows

Clever Throw Pillows

Over the last year I have continued to see and been enamored by throw pillows I’ve seen in home stores and magazines. Their beautifully patterned prints and various textured fabrics really make even the dullest of sofas really pop. I think of throw pillows like the special spice that really makes a recipe zing. They can just add so much.

My dilemma: I’m always attracted to the most expensive throw pillows. I like rich fabrics and expensive designer prints, but don’t have the budget to add them to my own living room.

I kept thinking “why don’t I just buy some fabric and make my own throw pillows?” I searched around online for fabrics that caught my attention, but again I seemed to like the fabrics that cost upwards of $40/ yard or even more. Again, out of my budget…I’m really frugal and sometimes just cheap.

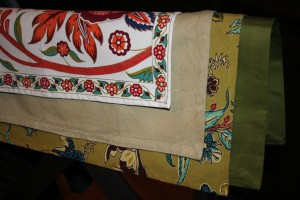
My solution: One day I was walking through World Market and saw they had a clearance section of cloth napkins and cloth placemats and the light bulb went off! I loved the fabrics and prints and they were already the size of throw pillows. There was a nice blend solids and prints that coordinated well. At $1 to $3 each I decided I had nothing to lose.

And my quest to turn these remnant cloth napkins and placemats into throw pillows began!

I wanted to make the throw pillow covers have a removable pillow insert so I could wash them. So, the only other thing I needed to buy was pillow stuffing and fabric for the insert pillows. I stopped by the craft store and a bag of pillow stuffing was anywhere from approximately $15 to $25. And I thought, yeah right…there has to be a cheaper way to make a pillow. And I found one. For $2 to $3 each I bought bed pillows from Walmart. Not only did I have my pillow stuffing, but also my cloth for the pillow inserts.

So, here’s how I made my throw pillows and how you can make yours as well!

In addition to the fabric (napkins or placemats) and cheap pillows to pull apart for the stuffing and fabric,
you’ll need a sewing machine, thread, pins, fabric scissors, and upholstery needle for your sewing machine (which I’d highly recommend using because when I used regular sized needles for my machine I broke 2 needles trying to make it work. Invest in the upholstery needles).

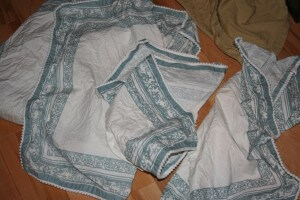
1. Wash the cloth napkins or cloth placemats first. This is really important as most of the fabrics will shrink a little and some more than others.

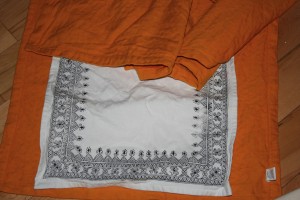
2. Find which fabric you want for the front of the pillow and which you want for the back. I suggest you use the napkin or placemat to its full size (don’t fold it down to fit the backing fabric). The backing fabric needs to be a little larger than the front fabric.

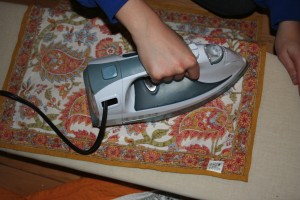
3. Iron both pieces of fabric (check the tags’ care directions first).

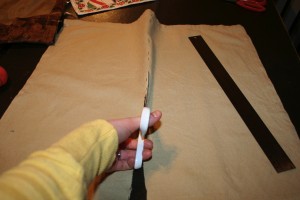
4. Using fabric scissors, cut the backing fabric in half where you want the opening for the pillow insert to be.

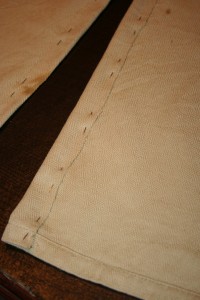
5. Pin back the un-hemmed edges you just cut and sew along those edges to finish them.

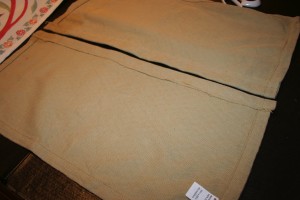
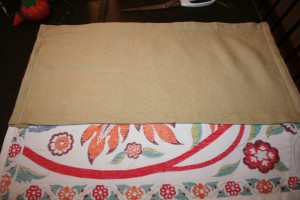
6. Line up outer edges of fabric, using the front fabric as a guide and starting in one corner. See photo below. Pin one of the short edges of the front and back face together, print sides out. And sew short sides of fabric together, on the inside of the fabrics edge.

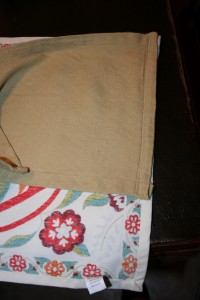
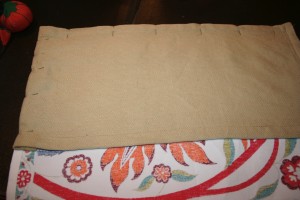
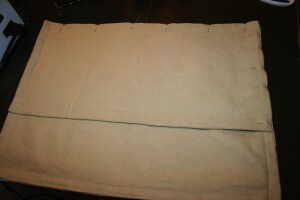
7. Pin the long side of both pieces of fabric together. Then fold under the backside fabric on the short end to align with the end of the front fabric, pulling taught, and pin along this edge. Sew along these edges on the inside of the finished edges of the fabrics. See photo below.

8. Repeat steps 6 and 7 with the other piece of backing fabric, overlapping the middle edges by at least 1 1/2″.

9. Create insert pillow by sewing two pieces of fabric together face sides in on three sides and half of the 4th side. Turn the fabric face side out. Stuff the pillow. The hand stitch the remaining opening.

10. Stuff the insert pillow into the pillow case and voila!

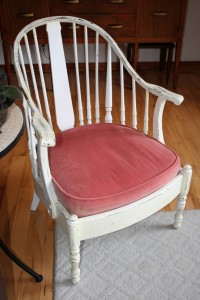
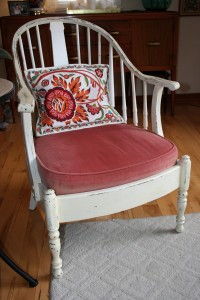
You’ve created a beautiful throw pillow that will turn a nice chair into a “Oh, what a cute chair”!

Grandma Jo’s Chicken with Mushrooms

Grandma Jo’s Chicken with Mushrooms

I’ve come to the conclusions that you know a recipe is going to be really good when it’s made by a grandma, who has cooked it for her family for 50 years, never written it down, and says she just adds a little of this and some of that.

This is my adopted grandma, Grandma Jo…that’s right, she’s not related to me by blood. She adopted me and Matt as her adopted grandchildren and we adopted her as our adopted grandma. Its kind of a long story of how this all came about, but long story made short: We met Grandma Jo through the Adopt-A-Grandparent program that I helped run in college. Because I was heading up the program and running the events I wasn’t going to adopt a grandparent myself, but Grandma Jo said “nonsense, you need a grandparent too.” We hit it off right away and felt like we had known each other forever. At the time, all of my grandparents had just passed away and I really missed having grandparents. Grandma Jo had always wanted grandkids. So, this was all perfect timing and we’ve been her grandkids and she’s been our Grandma Jo ever since.

Grandma Jo, a seasoned cook, full Italian heritage and born in Chicago in 1920, has stories better than any screen play ever written. She often has us over for dinner, cooking her homemade recipes, we listen to old records, play dominos, and talk to her about the decades past. Grandma Jo has so graciously shared many of her recipes with me and this is one of my favorites.

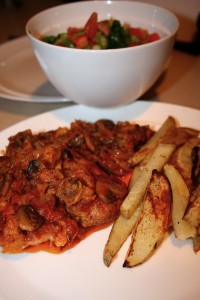
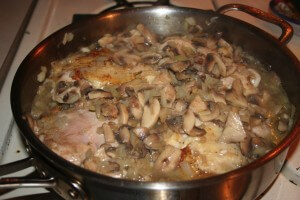
This one she just calls Chicken with Mushrooms. Its an Italian recipe that’s full of flavor and fairly simple to make. So, I hope it could become a staple recipe for you, like it has for me.

Ingredients:
1 package of chicken thighs (anywhere from 2 to 3 pounds worth)
3 tablespoons olive oil
1 container mushrooms, sliced
1 large onion, diced
1 small can of tomato sauce
Fresh parsley, chopped, add to taste
Salt and pepper to taste

Directions:
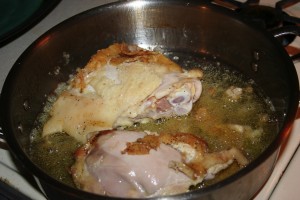
1. Wash chicken with water and salt and pepper. In a large frying pan add olive oil over medium heat and carefully add chicken thighs, skin side down. Brown chicken thighs on all sides. (To avoid oil splatter you can remove the pan from the heat and lay the chicken thighs down gradually)
2. Remove chicken thighs and set aside.

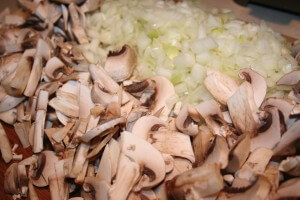
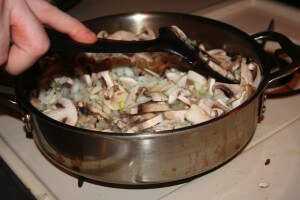
3. In the same pan sautee mushrooms and onions. You may need to add a little olive oil if they start to stick. Heat until the onion is translucent.
4. Add the tomato sauce, 3/4 of the tomato sauce can of water, the chicken and parsley into the frying pan. Mix all together and cover on low to medium heat. Cook for 45 minutes, turning the chicken over at least once. Adjust salt and pepper to taste.

5. Serve chicken on top of pasta or with a side of oven baked potato wedges. This recipe serves 4 people. Enjoy!

Thanks to Grandma Jo for sharing her delicious recipes!

Allergen Free Cupcake Tasting

Allergen Free Cupcake Tasting

Who doesn’t love cupcakes? I know I do. Well, today I had the privilege to take part in an allergen free cupcake tasting.

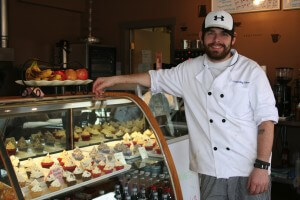
A friend of mine, Cheyne (pronounced Shane), is a cake artist who is just beginning to launch an allergen free line of cupcakes. Cheyne turned his passion for creating beautifully sculpted cakes into his business called Compelling Cakes. He not only creates beautiful occasion cakes, but bakes delicious cupcakes, or so I heard from everyone else because I could never eat them.

After telling him my personal frustration and disappointment of finding gluten free baked goods that contain eggs and dairy (other top allergens) at local bakeries, he decided to create an allergen free line that both me and another allergen free friend could both eat. He’s been working hard at perfected his allergen free line of cupcakes and his hard work has paid off.

Cheyne held his first allergen free cupcake tasting earlier this afternoon at Cafe Firefly in downtown Algonquin (IL), where Cheyne’s cupcakes and other baked goods can be found. He invited the local allergen free crowd to sample his cupcakes and can I just say….yummm!

I just had to share this beautiful arrangement that John Regan of Twisted Stem Floral in Crystal Lake sent along to Cheyne to congratulate him on his new line of cupcakes and to have in the cafe for the tasting. Its a gorgeous arrangement and looks great on the cafe’s counter. Great addition to the tasting; I just love flowers!

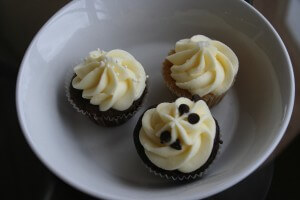
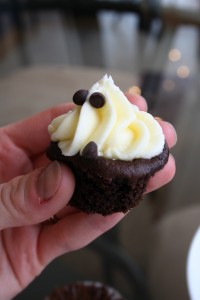
At the tasting I got to sample Cheyne’s allergen free chocolate cupcake, salted caramel cupcake, and chocolate bourbon cupcake. It was a delicious afternoon! The cupcakes were actually moist, light and fluffy and the icing was smooth and sweet. Texture is always difficult with allergen free baked goods, but Cheyne nailed it. I’m so excited to be able to actually go to a coffee shop and buy a cupcake! Another simple joy added back into my life.


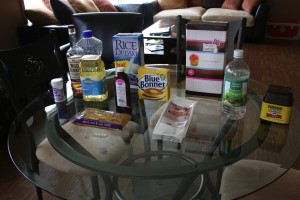
At the tasting Cheyne had all the ingredients out that he used for the cupcakes, just in case there were any questions. Great idea when you’re baking for people with food allergies.

His allergen free cupcakes will be for sale really soon, so make sure to follow him on Facebook (Compelling Cakes) to stay tuned. Or stop in to Cafe Firefly to check out the regular cupcakes he has available right now.

Even better, if you’re in the area (Algonquin, IL) next week you can take part in the second allergen free cupcake tasting he’s having. The tasting will be held next Tuesday, March 28th at 10 am at Cafe Firefly . Please let Cheyne know if you plan to come by dropping him a line on his Facebook page, Compelling Cakes. Thanks to Cheyne for the tasty allergen free cupcakes this afternoon. As a part of the allergen free community thank you, thank you for giving all of us another option!

*Compelling Cakes allergen free cupcake line stays away from gluten, eggs, and dairy. Please follow up with Cheyne at Compelling Cakes on Facebook for more details.

Allergy Sufferers’ Relief

Allergy Sufferers’ Relief


Happy Spring! Its now officially Spring and with Spring comes beautiful flowers, green grass, budding trees, warming sunshine, and hazy rainy days. But, Spring also means hello allergies once again!


Not to be “debby downer” because despite my own allergies I gladly welcome budding plants, green grass, and warmer temps. After all I do live in Chicagoland, where winter hits and it hits hard, so I’ve been ready for Spring since December.


Some may say if you suffer from Spring allergies just stay inside. This is definitely not an option for me as I crave the outdoors. So, in this post I’ll give some basic information about allergies and how I’ve gone about treating mine. Throughout the post I’ll post some beautiful Spring photos to remind you why staying indoors is last resort to managing your allergies.


First thing’s first, what are allergy symptoms?

Allergies symptoms can be quite varied, but here are some basic symptoms:
Runny nose Post nasal drip
Sinus headache (including pressure at the base of the back of the skull and into the upper neck)
Red, itchy eyes Coughing
Sneezing Wheezing/ Shortness of breath
Itchy nose and throat Conjunctivitis
Skin rashes


Second, what are you actually allergic to? When people say they’re allergic to pollen that can be true, but isn’t quite accurate enough. There are many different types of pollen. Knowing which ones you’re sensitive to is important.

Here’s a breakdown of seasonal allergens:


Tree Pollen- If you have symptoms as early as February through as late as May, then tree pollen could be your trigger. Even before you see buds on trees up North the tree pollen from the southern states actually blows up North with southern gulf winds.

Grass Pollen- If your symptoms don’t start peaking until May then grasses may be your trigger. Grass pollen will generally begin in May and last through August. If you head outside on a sunny day and your neighbors are all mowing their lawns and you begin reacting, then grass may be your trigger.

Weeds- If your allergy symptoms seem to be the worst from June until the first frost then weeds could be your trigger.

Ragweed-
This famous Fall allergen will start to effect sufferers from August until the first frost.


Then there are year round environmental allergens you should also be aware of:

Molds- Indoor molds are present year round. But, outdoor molds peak in the damp months of Spring when the snow melts and it rains more frequently. Outdoor field molds (meaning smuts, mushrooms, and field grain dusts) are year round except when the ground is frozen completely.

Dusts and Danders- These are year round, but increase indoors when the forced air and furnaces are turned on.

You may have one of these allergies or, like me, you may have them all.
So, how do I treat my allergies and their symptoms? Other than just taking typical allergy medicines there are lots of short term (quick fix) treatment options you can implement to reduce your allergy symptoms and many of them are free.

Here are the Top 10 things that have helped me to reduce my allergy symptoms:

1. Don’t sleep with your windows open. I love having fresh air blowing through my home, but keep them closed especially at night. Leaving them open, especially at night, allows pollens to blow through your home all night while you’re laying there breathing them in.

2. Keep your home clean. Stay away from antibacterial cleaning products (Lots of research backing this one up, but that’s for another post. Trust me on this one.). Vacuum, dust, and wet mop your home often.

3. Protect your bedding with allergen/dust mite protecting covers. Most allergist will recommend that you get these covers for your mattress, comforters, and pillows. If you can only afford to get covers for one item get a cover for the pillow you sleep on. It makes a world of a difference.

4. Wash your bedding often. Wash your sheets and blankets in hot water to kill mites and get rid of pollens and danders that you’ve brought to bed with you. I’ve found that even if I don’t get around to changing my bedding as often as I should, if I change my pillow case, even that makes a huge difference.

5. When my allergies are worst (late Spring through late Fall) I have found that showering or at least rinsing off in the shower before bed has made a huge difference for me. When pollens are at their peak and you’re outside, you’re collecting all those pollens on you hair, skin, eye lashes, and clothing throughout the day. Then when you go to bed, you’re taking all those pollens to bed with you. Showering at night helped me even more than allergy medicines last Summer. Try it!

6. Change all your clothing before going to bed. For the same reason as #5. Your clothes gather pollens and danders throughout the day. If you go to bed wearing that clothing, you’re bringing all those allergens to bed with you.

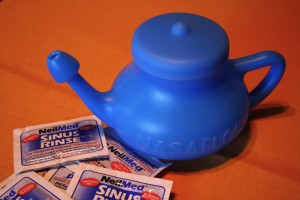
7. Use a nasal rinse, like the Netti Pot often during your peak allergy seasons. I know I’ve posted about the Netti Pot before, but it’s really been a life saver for me. During peak seasons try using it at least 2 times a day. It is a bit of a hassle, but really helps to relieve sinus pressure, congestion, and sinus headaches. I know the idea of saline liquid going through your nose isn’t really appealing and feels odd, but try it more than once. The first time its really strange, but I’ve gotten used to it. You can pick up a Netti Pot kit at the drugstore. Click here to see my previous post on the Netti Pot.

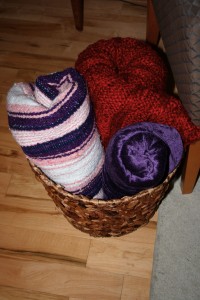
8. Wash your throw blankets and pillows often in hot water. You may forget about your pillows on your couch and those blankets you love to curl up with while watching a movie, but they collect dust, dander, and pollens just like your bedding. So, don’t forget to wash these often.

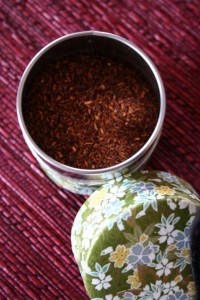
9. I discovered Roobios loose leaf tea (red tea) a couple years ago. I’ve found that high quality Roobios loose leaf tea relieves my allergy symptoms. It especially helps to relieve wheezing, coughing, and tightness in the chest. It has to be high quality, or I’ve found it doesn’t really work. I buy my Roobios Tea online from Our Special Tea.

10. Buy an air purifier for your home. Get one that has a a true HEPA filter (a HEPA type filter is NOT a HEPA filter) and a carbon filter. Run the purifier especially in your bedroom at night to reduce your symptoms. I have a Holmes air purifier that I use often.

Long Term Allergy Treatment:
Because I have so many allergies and they are pretty severe, I’ve turned to long term treatment for my allergies by doing immunotherapy allergy shots. The shots work by gradually introducing the allergens back to your body to reduce your body’s reaction to the allergens. They are not a short term fix. I have completed one full year of the shots and this year I’m feeling much better than last year. If you’d like to get more information on immunotherapy allergy shots click here for a link to my allergist’s website.

I hope this information will help you to manage your environmental allergies and their symptoms so that you can enjoy the great outdoors this Spring, Summer, and Fall and be comfortable indoors during the Winter. Just remember there is more that you can do to manage your allergies than just taking your typical allergy medicine. Here’s to beautiful Spring days!


Julia Child Inspired Dinner Party

Julia Child Inspired Dinner Party

Julia Child is a chef that gave new life to French food and brought those beloved European recipes into homes across the States. Her story and recipes are now being revisited by a whole new generation with the release of the film Julie & Julia in 2009. My friends and I are included in the group of those being reintroduced to this brilliant chef and her recipes. I remember seeing her on TV cooking shows on Saturday mornings when I was a kid and am now intrigued by and enjoying her tasty recipes!

This dinner party, hosted by my friend Mary, centered around this famous Julia Child inspired recipe: Beef Bourguignon.
Here’s a link to the recipe: http://abcnews.go.com/GMA/recipe?id=8222804
Its a little more complex than some of the recipes I’ve posted in the past and I have to admit that the version we made is not exact. You could say we simplified, but it was still delicious.

(Gluten Free: we used corn starch to thicken and make sure you used GF beef stock)

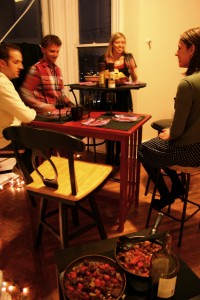
We started our dinner party sitting around the coffee table on floor pillows eating appetizers, enjoying a warm fire, listening to great music, and talking and laughing a lot.

Mary’s sweet little pup Jay Jay even enjoyed the warm fire with us on the cold winter night.

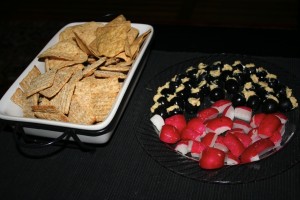
Our simple appetizers included crackers and tortilla chips, sliced radishes, and black olives stuffed with hummus (you could also use goat cheese or blue cheese). Remember the point of appetizers is just to give your guests something to munch on when they arrive. You don’t want them to fill up on them if you’re preparing a generous meal.

Our Beef Bourguignon progressed nicely and filled the house with a great aroma that definitely made us all crave the warm meal’s hearty goodness!

Serving the tasty dish right out of the pan not only keeps it warm and ensures you enjoy every bit of the pan juices, but also saves on dishes you have to wash (major bonus in my opinion)!

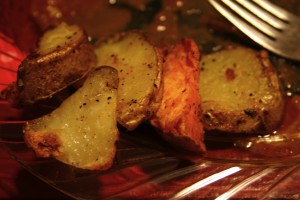
The Beef Bourguignon pairs really well with oven roasted white and sweet potatoes and red wine.

Hope this inspires you to start cooking! Remember even if you simplify complex recipes, you’re still cooking…props to all of you out there who dare to step outside of your food/ cooking box and try new things! Keeping cooking!

Spring Baby Shower Decor

Spring Baby Shower Decor

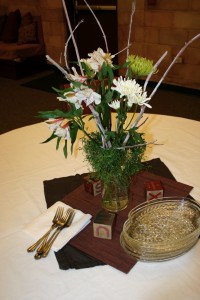
As promised earlier this week, here are the pics from Baby Shower last weekend that I did the decor for (with lots of help from friends may I add). I searched around the craft store for about an hour trying to find the perfect thing. Again, it had to be not “babyie” it needed to look fresh and welcoming and be gender neutral. We didn’t want to spend a bundle on decor, but wanted it to be really special. So, here is how it all came together.

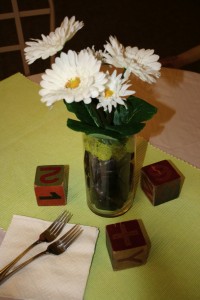
Five of the table had the center piece shown above. A small bunch of silk daisies, in a clear cylinder vase filled with natural stones and green moss. A friend had a bunch of the antique baby blocks that added a beautiful touch to each table.

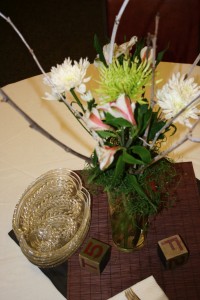
For 2 of the centerpieces I bought 2 bunches of fresh flowers (one for each vase) and had these twigs I painted white for a winter centerpiece. I placed them together in taller clear cylinder vases and stuffed a little green spanish moss to pour out of the top (holding the stems all in place).

Earthy and simple!

The diaper cake was elegantly placed on a cake stand with a clear plater on top (nice touch June) on the gift table!

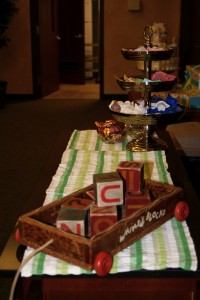
On the drink table sat an antique baby wagon with more of the antique baby blocks, a colorful runner (really placemats we pulled together), and a 3 tiered stand with chocolates and coffee accessories.

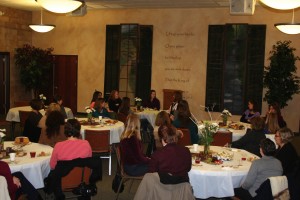
Eating, chatting, laughing, and loving on the mom-to-be!

A great time celebrating a wonderful blessing in life! Great job ladies for pulling off a wonderful shower! Only a month until we’ll all get to meet the new little one!

Diaper Cake for Spring

Diaper Cake for Spring

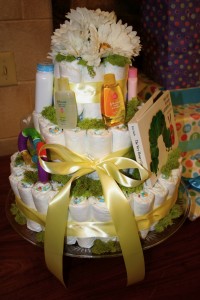
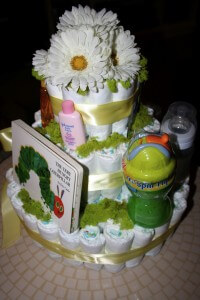
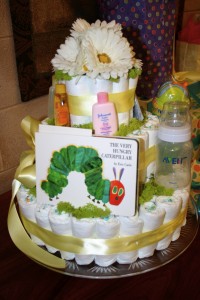
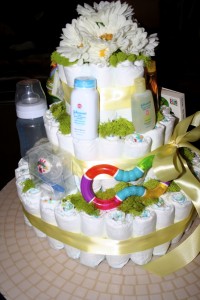
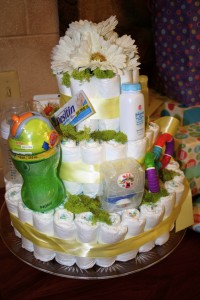
I just made a diaper cake for a dear friend’s baby shower this past weekend.

She’s due to welcome her little into the world at the end of the March, so we’re all getting really excited! She doesn’t know if her little one is a boy or girl, so she is doing most of her bedding, blankets, etc. in green, so she can add in blues or pinks when she meets her/him.

With my excitement for Spring and knowing the baby will be born this Spring, I went with a Spring look for the diaper cake and shower decor (I’ll post later this week). I was trying to get some inspiration for it all and kept thinking about Spring green moss. Its the right color, not overly “girlie” or “babyie” (neither the mom-to-be or myself are into the “baby look”; you know clowns, noah’s ark, winnie the pooh, etc.). So, this fresh look really seemed to work well.

I used green moss and 2 small bunches of silk daisies I bought at the craft store, as well as pale yellow satin ribbon I got from Buy Buy Baby (they have available in their complimentary gift wrap station) to decorate the cake.

On the tiers of the diaper cake are baby items mostly from the mom-to-be’s gift registry, including the book “The Very Hungry Caterpillar” (one of my childhood favorites and this one is a cardboard book, so its great for young children). There are 2 baby bottles in the center of the cake and one on the lower tier. The cake includes 100 size 2 diapers that will definitely be used in the future.

There is a pack of “rockstar” pacifiers and a baby teething toy, as well as a sippy cup and travel sized baby care items.

Diaper cakes are great baby shower gifts, as they’re not only a gift but a decor item on the gift table and can decorate the baby’s nursery for a while.

Have a baby shower you need a gift for? Not sure what to get? Let me know as I now offer diaper cakes for sale, special made for the mom-to-be’s nursery theme and registry items. Interested? Contact me through the Ask Madindy page.

The Sweet Stuff and Your Weight

The Sweet Stuff and Your Weight

I’m wordy again today, but I’m hitting a topic that you’ve got to know the facts about! Did you ever wonder why people who continually drink diet sodas often seem to be overweight?…then read on. I noticed this through pure observation when I was really young, which is why I’m fascinated by this research.
Let’s get the facts and stop letting advertising campaigns educate us about what’s good for us.

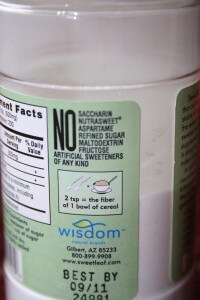
Sugar has become the villain in today’s diets and artificial sweeteners have become a hero to dieters everywhere.
More and more research and studies are exposing the truth about artificial sweeteners, showing they not only contribute to weight gain, but can cause a whole world of health issues.

The Problem We’re Trying to Solve:
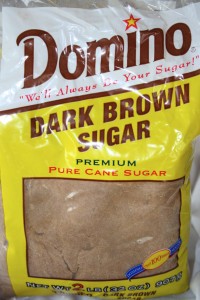
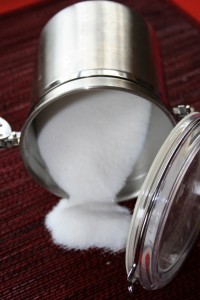
We as a society (I’m definitely included) love sweet foods, juices, sodas, yogurts, desserts, cereals, etc. But, we don’t like the negative side effects that consuming excess sugar has on our bodies. Side effects such as weight gain, diabetes, elevated triglycerides (leading to heart disease), suppressed immune system, etc. So, we look for ways to still indulge in the sweet taste, without these terrible side effects…thinking that we can have our cake and eat it too.
source: http://www.healingdaily.com/detoxification-diet/sugar.htm

Real Sugar:
According to a series of experiments done at Purdue University and published in Behavioral Neuroscience, when you consume real sugar (from foods such as fruit, table sugar, honey, real maple syrup, etc.) your body connects and anticipates the caloric load that comes from eating these real sugars and it revvs up your metabolism.
source: http://www.time.com/time/health/article/0,8599,1711763,00.html

According to various research studies and written about by Andreas Moritz (naturalnews.com ),

“The body has a self-regulating mechanism, a kind of thermostat that measures the amount of energy (or calories) it can obtain from a particular meal. When your body has received enough energy from the food you have eaten, then your mouth, stomach, intestines, and liver send messages to the brain that all energy requirements have been met. Subsequently, your nervous system secretes hormones that stop your desire for more food. This point of saturation is essential for your wellbeing, for without it you would continuously want to eat and never feel satisfied.”

The problem is we eat too much sugar and require our foods to be sweeter than our ancestors ever did. According to Dr. Hubber, healthyalterego.com, if you look back to 1910 the sweet foods that people consumed were mostly from natural sources like fruits. Even table sugar was not highly used. Our problem today is that we eat far too much sugar. Our tolerance for sugar has risen; we need/expect our food to be sweeter.

Artificial Sweeteners:
To solve this dilemma (wanting the sweet taste without the negative side effects) many people have turned to artificial sweeteners. This includes anything that’s labeled diet, sugar free, or products that contain sucrolose, aspartame, saccahrine, NutraSweet, Sweet ‘N Low, Neotame, Splenda, Equal, etc.

The Truth About Artificial Sweeteners
Why Artificial Sweeteners Make you Fat:
Dr. Huber (healthyalterego.com) summarizes all the research and science stating,

“Translation: fooling the body with excessive sweeteners resulted in increased calorie intake at subsequent meals as their appetite was stimulated, increased weight gain and fat deposits, lowering of metabolism so fat burned less efficiently.”

Basically, artificial sweeteners never satisfy your body’s craving for calories and cause you to just crave more. That’s not so good for those trying to loose weight by eating these substitutes, but is really good for the companies making these “diet” foods and drinks because you’ll eat more and more of them.
other sources: http://www.naturalnews.com/022785.html
http://www.time.com/time/health/article/0,8599,1711763,00.html

The Other Side Effects of Artificial Sweeteners:
You can look through all these sources to see the details including how these items scooted their way past the FDA, but here are the basic facts.
Aspartame (and the sweeteners made from it, phenylalanine) are especially dangerous as they damage the central nervous system. Some of the health issues they cause include migraines, fuzzy thinking, changes in behavior, depression, seizures, visual disturbances, gastrointestinal reactions, joint pain, fatigue, etc. Aspartame is the cause of over 75% of adverse food reactions reported to the FDA.

Other artificial sweeteners can cause cancers, testicular damage, negative effects on baby of a pregnant woman, and much more.

sources: http://articles.mercola.com/sites/articles/archive/2010/07/31/aspartame-update.aspx

http://www.naturalnews.com/022785.html

http://articles.mercola.com/sites/articles/archive/2009/10/13/Artificial-Sweeteners-More-Dangerous-than-You-Ever-Imagined.aspx

What to do?
So, you feel like you’re between a rock and a hard place? You don’t want to eat sugar because you’re watching your weight, are prone to diabetes or candida overgrowth, but obviously these artificial substitutes are not a better option.

I’ve personally noticed that when you eat sugar, your body craves more. One thing to do is to fight the cravings and just not give in. I crave sweets, but for me its especially chocolate. With my restricted diet, unless I make sweets from scratch I often cannot eat them. I satisfy my craving, by keeping a bar of high quality dark chocolate on hand. When I crave sweets, I’m shocked that a small piece of this high cocoa content (less sugar than lower cocoa content chocolate bars) bar often satisfies my craving.

Find a way to satisfy those intense cravings, that works for you. Such as:
-Fruit, its sweet and natural
-Indulge in what you crave in smaller amounts
-Real soda but a small amount

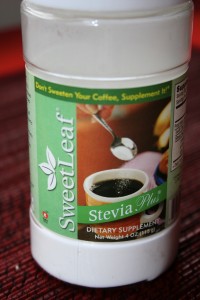
Another option is the natural sweetener that’s been used for centuries called Stevia. You can find it in the health food section of your grocery. Its made from a leaf and contains no sugar and its natural (not man made, but found in nature).


Another option is Agave Nectar. Made from the agave plant, its also a natural product. It contains sugar but has a lower glycemic index (good for those watching weight or those with diabetes).

I hope this will encourage you to know what you’re eating before you eat it. The sources I’m linking to in this article are just some of many that are out there supporting these facts.
Still confused about what to eat and not eat? My general rule of thumb is, eat real stuff…ingredients made by God, not a scientist. Eat what you love but in moderation.

Have a good weekend!

Other sources:

http://www.splendaexposed.com/

http://abcnews.go.com/GMA/OnCall/story?id=4271246&page=1

http://www.medicalnewstoday.com/articles/96849.php


Follow Madindy

Follow Madindy

You can now follow Madindy on Twitter #/madindyliving and on Facebook #/pages/Madindy/165406443508796?sk=wall#!/pages/Madindy/165406443508796?sk=wall.

Considering I’m still holding onto the past a little bit in my personal life (maybe texting on my phone will be the next technological advancement in my personal life! I think I’m the only 20 something in this country without texting on my phone), I’m pretty excited that I’ve stepped into the year 2011 with Madindy!

Quick Valentine’s Dessert

Quick Valentine’s Dessert

Just in case you forgot, today is Valentine’s Day. So, you have no idea what sort of dessert you can have on a restricted diet or with limited time to make it…How about chocolate fondu!

Even with my restricted diet, chocolate fondu is a great no bake dessert that I can eat.

The best part about chocolate fondu for Valentine’s Day is its a fun activity that you can share with your loved one!

Here’s how I make my chocolate fondu:
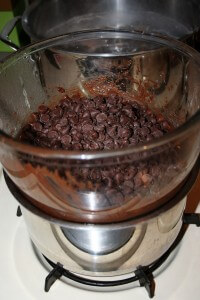
I take a package of allergen-free semi sweet chocolate chips and melt them down in a double broiler. I swirl in a little water and a touch of vanilla extract; stir thoroughly and pour into your fondu pot with a candle or sterno lighter below.

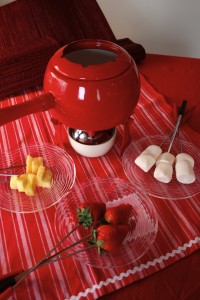
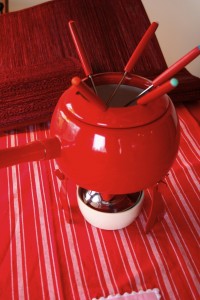
I found this cute little fondu pot at a thrift store several years ago…the red color makes it feel even more festive!

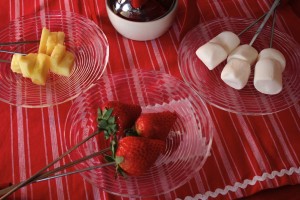
My favorite fondu dippers that follow my restricted diet:
Strawberries
Pineapple
Marshmallows
GF Animal Crackers
GF Graham Crackers
GF Pretzels
Bananas (I can’t eat em’ any more but used to be my favorite dipper)

Even with not much time to prepare and even on a restricted diet, you can enjoy this delicious dessert/activity with your loved one. Happy Valentine’s Day!