Category Archives: Creative Living

Re-purpose It: Garden Stakes

Re-purpose It: Garden Stakes

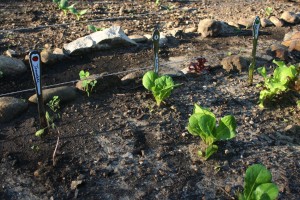
This year has been a perfect growing season in the Chicagoland area, hot sunny days and plenty of rain. My garden is growing nicely. My hubby and I decided to plant such a variety of produce in our garden and I’m always loosing track of what’s planted where. So, I decided I needed garden stakes to mark each item. You know me…I never really think, “oh I’ll just go buy that.” I’m such a do-it-yourselfer, I always seem to think “how can I make it.”

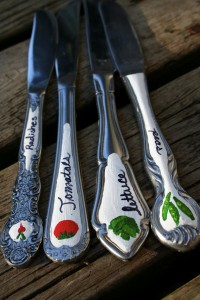
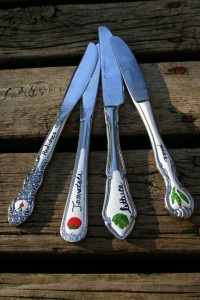
I stopped by the thrift store and found tons of dinner knives (odds and ends from many different sets) and bought a hand full. I broke out my acrylic paints and painted away. To prevent the paint from peeling off of the metal I double coating each knife with water based polycrylic.

I love this Re-purpose It project because it gives these old unwanted items a new life! Talk about ‘Going Green,’ I think Re-purposing old items is the ultimate way to ‘Go Green.’ The various shapes and details on each knife really makes for such a wonderful variety.

Dinner knives work perfectly for these Garden Stakes because the knife end holds really well into the ground. Hope you feel inspired today!

Start Gardening Part 3

Start Gardening Part 3

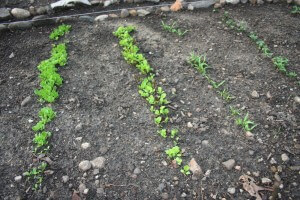
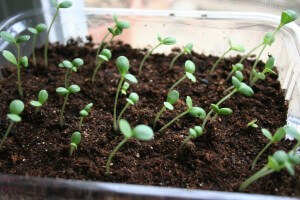
With warm sunshine and lots of rain, my garden is growing very nicely. The seeds have sprung into sprouts that have pushed their little heads through the soil and are now reaching for the warm Spring sun. The lettuce, cabbage, broccoli, spinach, peas, radishes and kale are loving the cooler days. And as the sun starts to warm the rich soil in the next week, it’ll soon be time to plant the tomatoes, squash, and cucumbers outside.

So, how do you prepare your seedlings you planted in containers indoors for planting in your garden outside?

Once the seedlings begin to lose their first leaves, grow their true leaves and are gaining height quickly you know they are almost ready to be planted outdoors.

Next, its time to move the seedlings in their containers outdoors. They should be placed somewhere outdoors where they’ll get some sunlight but not a full days’ worth of hot sun. Make sure to keep them well watered and watch how low the temperatures fall at night. If the temps are dropping low bring them indoors. They should stay in their containers outdoors for about a week in order to be properly acclimated.

Once your seedlings begin to sprout in your garden, what’s the next step?

If you’re like me, when you read a seed packet and it says to plant the seeds however many inches apart, you think, “but if I plant more that’s even better.” Sorry to say like I found out, wrong…The seedlings won’t continue to grow to maturity unless they have enough room, sunlight, and water. And if they’re planted too close together they rob each other of all three.

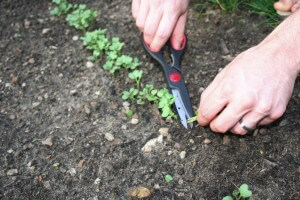
So, once your seedlings begin to sprout through the soil, you have to cut some of the seedlings back so the remaining ones will continue to grow larger. Cut them down at the soil level, leaving enough seedlings properly spaced according to the specific seedling packet.

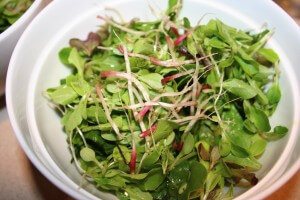
Once you’ve cut down all those little seedlings that weren’t spaced far enough apart, don’t throw them out.
Did you know you can eat the spinach, lettuce, and radish seedlings? I added the seedlings to a some store bought lettuce and had my first taste of my garden produce…even as small as it was.

Make sure to watch your garden plot to see if any little critters have been enjoying your garden space. I found that a few neighborhood deer just loved tromping through my little garden plot, so some fencing was in order.

Enjoy your yard this growing season by joining me and growing your own food!

Spring Beauty

Spring Beauty

Spring is slowly making its way north. So, I thought I’d share some photos of Spring from Indianapolis, St. Louis, and Chicago. I experienced Spring in St. Louis about a month ago and Spring in Indy last weekend. Come on Spring in Chicago!

From crocuses to blue bells to crab apples to hyacinth to magnolias these beautiful blossoms are sure signs of Spring.
Get outside and enjoy the beauty!

Laugh Today

Laugh Today

I thought I’d start the week off with something to make you Laugh Today. Matt and I recently took a trip down to St. Louis with some college friends to visit other friends. We stopped at this gas station in the middle of nowhere and saw this sign on the side of the gas station. Now I love the south. I mean I have a lot of family that lives there, but I just had to laugh at this one. We decided this was one of those…”You know you’re in the south when…”

We thought it was great that this gas station not only serves Champs Chicken, hot pretzels and chili, but just in case you had a craving during your long drive you can also purchase gizzards, liver and catfish while you your pump gas here. Sorry, I can’t remember exactly where this station is, so you’ll just have to find somewhere else to buy your gizzards, liver, and catfish along the highway! LOL!

Frozen Coconut Macaroon Bonbons

Frozen Coconut Macaroon Bonbons

With Good Friday today and Easter approaching this weekend, it’s really such a wonderful weekend of reverence and celebration that our Lord and Savior, Jesus Christ, died and rose again for our salvation! What a wonderful celebration!

I’m always looking for desserts that are extra special to make for such celebrations as important holidays and birthdays. A treat that really wows and says “Now this is a celebration!” Even those of us with restricted diets love a decadent dessert to celebrate special events. Restricted diet or not, these Frozen Coconut Macaroon Bonbons are a mouth watering dessert to have at your Easter dinner this weekend or at a birthday bash! If you gave up sweets for Lent this year, what a better way to end your sweet fast than with these delicious little treats?

I actually made these Bonbons for my birthday last fall and lost the recipe…sad day! To my wonderful surprise I received a card from my Mom yesterday with a copy of the recipe I had made for her inside! So, thanks to my Mom for saving the recipe!

Ingredients:
2 2/3 cups (one 7 oz. bag) sweetened, flaked coconut
1/4 cup well-shaken, unsweetened coconut milk (not light)
2 tablespoons organic, refined coconut oil (get it in your health food section of your grocery or at Whole Foods)(try to liquify the oil before measuring)
1 tablespoon agave syrup
1/2 teaspoon vanilla extract
1/4 teaspoon salt
1/4 cup gluten free, dairy free semisweet chocolate chips, melted and cooled

Directions:
1. Line baking sheet with parchment paper.
2. In a large mixing bowl, stir together coconut, coconut milk, oil, agave syrup, vanilla and salt.
3. Drop by tablespoons onto prepared baking sheet, then roll into balls, and freeze for at least 1 hour.
4. Remove bonbons from freezer and dip bottoms into cooled, melted chocolate. Return bonbons to the freezer for at least 20 minutes and remove them from the freezer 15 minutes before ready to serve. Enjoy!
5. Store completely hardened bonbons in an air tight container and keep frozen for up to 2 weeks.

*Recipe Source: Allergy-Free Desserts by Elizabeth Gordon, 2010
*25 minutes prep time plus freeze time
*Makes 16 bonbons
*Per serving: 97 Calories, 2 g Protein, 8 g Carbs, 1 g Fiber, 7 g Total Fat, 41 mg sodium

Start Gardening Part 2

Start Gardening Part 2

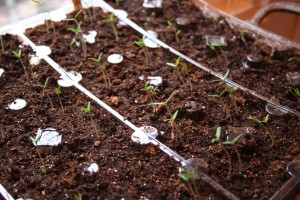
Even though this week is feeling more than winter than spring temperature wise, flowers are still budding and my gardening efforts continue. So, did my seeds I planted in small containers indoors a week and a half ago ever sprout and push through the soil? Should you even try to plant seeds to start them indoors? Does it actually work?

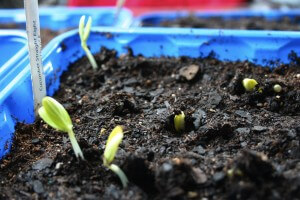
I’m excited to say YES! Its only been a week and a half and my zinnias (flowers) are growing quite nicely.

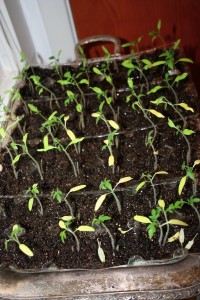
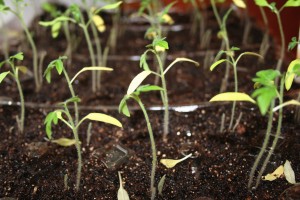
My tomato seeds are springing up from their little egg carton cups, bending to reach for the sun. I was most skeptical about the tomato seeds because I’ve never grown tomatoes from seeds, but so far they’re working really well.

My cucumber and squash seeds are poking their little sprout heads through the soil and growing more each day.
All I’ve done with my potted seeds is to plant them in well drained containers in a mixture of potting mix and seed starting soil. I’ve placed them in well lit windows inside my home and watered them with warm water as needed and Voila!

Matt and I started planting in our garden over the weekend as well. But, first we had to create our garden plot. So, how did we do it and how can you start a garden of your own? Keep on reading.

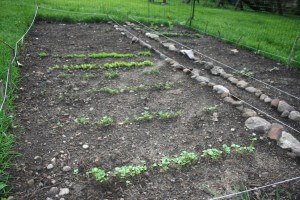
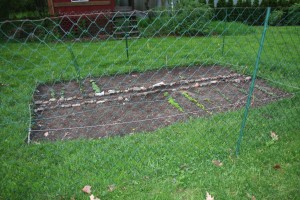
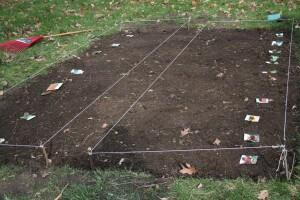
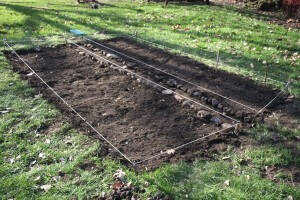
Plotted out our the garden area by spray painting where the perimeter would be. Then we dug out the sod and set it aside. Make sure to get all the grass roots out of the garden area so you don’t get grass growing up in your garden. Then we shook and scraped all the soil off of the clumps of sod, so we still had enough soil in the garden bed. Then we tilled and raked the soil, adding about 5 bags of top soil into the mix.

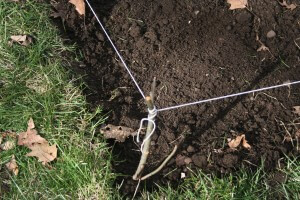
Then we took twine and sticks to plot out the planting areas within the plot. We decided to divide our large plot into 2 smaller plots with a walkway down the center so we could get into the middle of the garden to weed without stepping on the plants. We decided to plant our seeds in short rows going from the outer long edges toward the center. We marked each row with a small stick stuck int he ground along the outer perimeter of the garden. I then drew out the garden on a piece of paper, writing down where each item went and will go.

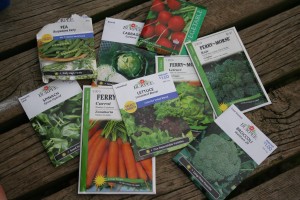
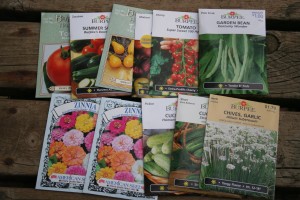
We laid out the seed packet of each thing we are planning to plant so we could plan out where everything was going to go. And then we planted the seeds of the vegetables that could be planted this early in the year. Plants like radishes, broccoli, cabbage, lettuce, and peas can be planted while its still chilly outside. We made sure to plant all the seeds leaving a 5 to 6 inch border around the edges for timbers we will later place around the edges to keep the grass and weeds out. Water the garden really well right after planting.

Because our garden plot sits on a slightly graded area I was a bit concerned that when I watered it or it rained really hard the soil would all wash toward the lowest area. So to help prevent the soil from washing away I lined the center pathway through the garden with stones that actually did help block the soil from running down the grade.

I hope this inspires you to start your own garden this year too!

Fabulous Spaces: Shelly & Andy’s Urban Revival

Fabulous Spaces: Shelly & Andy’s Urban Revival

Today I’m featuring the home of some of my closest friends, Shelly and Andy. Shelly and I were room mates in college and are still best buds. Shelly and Andy have their own wedding photography business and Andy is an electrician, so needless to say they have a perfect balance of creativity and the know-how to really create a beautiful home. They’ve added their own personality and design style to their home while really respecting the historic nature of the space. They’ve done and are continuing to do a lot of work on their home themselves. With its southern urban charm Shelly and Andy’s home is a real beauty.

Meet Shelly & Andy with the rest of their family Colby (the little black poodle) and Norman (the adopted gray alley cat). They all currently reside in this mid 19th century row house in the area called South City in St. Louis. They moved into this historic beauty, built by a Civil War doctor, in this up and coming area of the city a couple years ago.

We’ll start with the exterior of their home. Upon approaching the front of their home this beautiful magnolia tree greets with a certain southern charm. These bright blossoms always remind me of the movie Steel Magnolias. I guess that’s why I always think southern charm when seeing them.

When walking to their front door the details of their home really start to make a bold impression. The brick archway opens to a covered entrance boldly displaying this is the entrance to the home.

This brickwork is definitely from a time past. The design, care and attention given to these beautiful details is something very rarely seen in homes built today. The magic is really in the details in these historic homes.

The doorway is not the only emphasis on the front elevation. This large window is built with a carefully crafted brick arch surround giving it both prominence and unity across the front of the home.

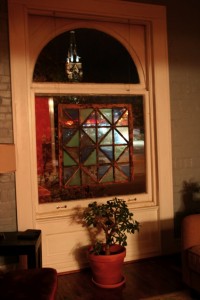
The simple stained glass piece hung in the window adds an updated touch of texture and color. It also provides some privacy for the living room from the street view without having to add draperies to the interior space.

The tall ceilings are an added benefit of this 19th century home, making each room feel even larger. Traditional details like the casings and mantle stand in wonderful contrast to the updated furnishings with whimsical fabrics and a variety of textures.

The brick from the fireplace carries over to the the adjacent walls adding scale and texture to the great height of the walls.

The transoms over the door ways are another element that helps to break down the scale of the tall ceilings and allow light to be borrowed from room to room.

Shelly and Andy have added a little modern twist to the very traditional spaces in their home by selecting bold colors like these bright red walls in the dining room. The moroccan patterned rug and the rustic table and chairs with a more modern silhouette add a little cultural flair to the space.

The stairway in Shelly and Andy’s home is off the kitchen and although its a steep flight, the stained wood stairs and rail stand in nice contrast to the white beadboard on the wall.

Shelly and Andy have pulled together their master bedroom with a serene Spring green color on the walls. With no room for end tables with lamps because of the symmetrically flanking closets, Andy wired some adjustable wall sconces. A great solution and the ability for them to adjust and move around makes for great reading lights. A team effort, Shelly and Andy made their upholstered headboard themselves as well.

They’ve pulled together the space by letting the green walls stand as the main color in the room and selecting all neutral colored bedding with varying textures that really make the space look warm and rich.

Although the fireplace in the bedroom is not functioning, it adds a nice focal point on the main wall seen when entering the bedroom. Above the mantle is a beautifully over sized print of Shelly and Andy’s wedding photo. I love the large scale of the print with an elegant matte and frame.

I hope this tour through Shelly and Andy’s Urban Revival inspires you to add your own personal style and taste to complement your home’s architecture. Thanks to Shelly and Andy for sharing their lovely home with us as well! Have a great weekend!

Nacho Appetizer Tray

Nacho Appetizer Tray

Like I’ve said before, one of the toughest food scenarios I face with my restricted diet is appetizers and finger foods.
What to eat or bring to get-togethers and parties that doesn’t have dairy, eggs, gluten, or any of my other random no no foods. All the frozen appetizers you can buy and heat up in the oven are breaded, fried and have cheese. Most dips have cream or cheese. Dessert? Forget it if its not homemade with specialty flours and egg replacers.

So what’s a quick appetizer you can throw together last minute that will be a hit?

Try a Nacho Appetizer Tray! I got this idea when I was walking through the grocery store looking for something to make last minute for a get-together. I saw this pre-made layered nacho dip (layered refried beans, sour cream, cheese, salsa, tomatoes, olives and green onions). A small tray of this dip ran about $16. Expensive for what it was if you ask me.

I couldn’t eat this dip tray because it had cheese and sour cream mixed in with it.
So, I thought why not serve a disassembled version of this?

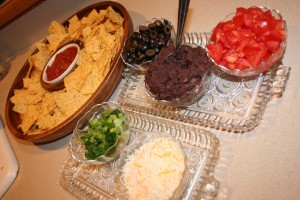
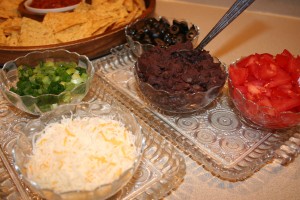
I decided to serve the chips and salsa in a typical chip and dip tray and then served the remaining toppings in small glass bowls on glass trays. I put a spoon in each and set out small plates so everyone could pick and choose their own nacho toppings. It turned out to be very inexpensive, easy to do, and had a lot less preservatives than the pre-made tray. The only real prep work included taking the salsa, beans, cheese and chips out of their containers and into the serving trays. I cut up the green onions, olives and tomatoes and put them in their serving trays. Voila!

Here’s a list of what I included in my Nacho Appetizer Tray, but you can pick and choose what you want to include in yours.

Corn chips
Salsa
Diced tomatoes
Sliced green onions
Refried beans
Sliced black olives
Shredded cheese

Other toppings you could include:
Sour cream
Fresh cilantro
Melted nacho cheese
Pico de gallo
Black beans
Seasoned ground beef or turkey

I hope this gives you another option of something to served for your next party!
With the left overs I made a meal of taco salads, which turned out really tasty. Enjoy your next party even on a restricted diet!

Spring Has Sprung: Gardening Jumpstart #1

Spring Has Sprung: Gardening Jumpstart #1

I think it’s now safe to say that Spring has FINALLY Sprung in the Chicagoland region where I live! After a rough winter with one of the worst blizzards in history, I have to say I couldn’t be more grateful for Spring than I am this year. Sure the official date of Spring was a while ago, but the temperatures are just now starting to show signs that my beloved season, Summer, will in deed be on its way this year. The trees are just beginning to bud and the crocuses, daffodils, and tulips are now peaking their greens and blooms through the mulch and grass. I now consider it Spring!

As you have been able to tell from the wide variety of topics I share on this blog, I have a lot of interests, passions, and hobbies. One I’d like to share today is my love for gardening! Why Gardening you ask? Gardening is such a relaxing activity that Matt and I both love. It’s a low cost activity for us and allows us something to enjoy outside all summer long. We hope to use it as a source of organic produce as well.

Looking for a way to keep your kids busy outside when the weather is nice? Introduce them to gardening. It’s a great way for them to burn energy outside, while also educating them about biology, God’s creation, healthy eating, and introduces them to a new hobby! Have a picky eater? Try getting them involved in growing some of their own food. There’s significant research that shows that kids are more likely to eat fruits and vegetables if they take part in cultivating them.

I may be slightly high maintenance (my hubby will laugh at the word slightly), but I have to say there is nothing better than hands, feet and knees covered in dirt from working outside. I can’t say I’ve acquired a completely green thumb, but it’s getting greener as I learn more. So, I invite you to join me in getting a little dirty this Spring and start a garden of your own.
How do you start a garden of your own? Here’s how I started mine.

For the past few years we resided in an apartment with just a balcony of outdoor space, but because we both love gardening we made it work and covered our balcony with planters as if it were a yard. We grew everything from various flowers to herbs to tomatoes to cucumbers and radishes. (I had to draw the line though when Matt wanted to plant corn).

Now we live in a house with a yard, so we have the room to plant much more. But, I encourage you if you just have a small balcony fill it with planters and enjoy!

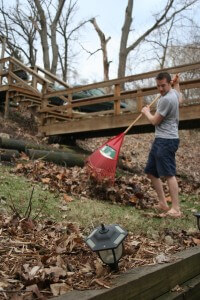
Start your gardening season by first cleaning up your yard or whatever planting space you have. If you only have a balcony, congrats, less to clean up. If you have a yard, rake up the leaves and sticks that have been blowing around your yard all winter. Especially pay attention to your flower and garden beds by cleaning up dead plants from the previous year.

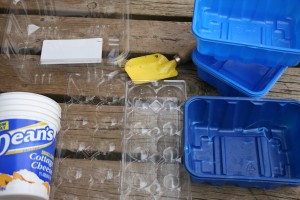
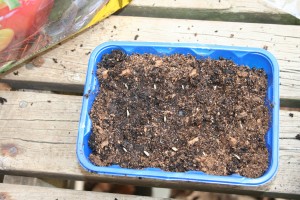
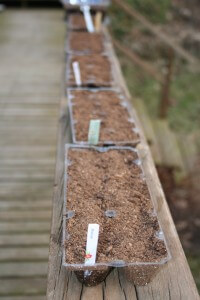
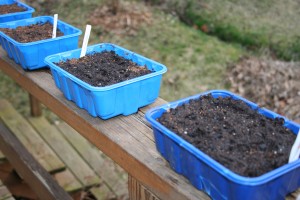
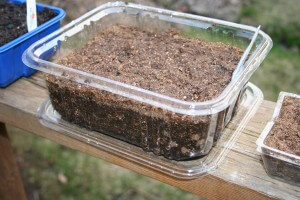
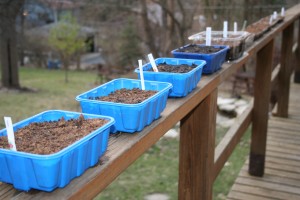
I decided to start some of my plantings indoors this year as its still a little chilly to plant certain crops. I’ve seen the cute little planting trays in the stores, but my frugality and hate for waste kicked in and I collected my own. Egg cartons, cottage cheese containers, trays that you get mushrooms and mixed greens in work perfectly. I poked holes with a knife in the bottom of all the containers except the egg crates because the cups are so small. I’ve been collecting these for a few weeks now. I encourage you to dig through your recycle bin and get creative.

I don’t normally grow everything from seeds and I suggest if you’re just starting to garden to start some things like tomatoes from plants you buy at your garden store. I thought I’d be a little more adventurous this year and try to plant more from seeds. We’ll see how it goes!

I used a combination of soils to start my container plantings indoors. When planting from seeds use some seed starting formula soil. It’s available at garden stores and larger stores like Walmart that have a garden department. I mixed some of the seed starting formula with some potting soil. Follow the seed packet directions for the depth the seeds should be planted. Cover and water thoroughly (gradually for the ones in the egg cartons).

Make sure to keep the names of the plants with each container so you don’t forget what’s in each one.

Bring them inside and place in windows that get sunlight. Seeds are supposed to begin to sprout in 7 to 14 days. I’m only on day 2 myself so I’ll let you know how they work.

Make sure to put something underneath the containers that you poked holes in. The lids of some of the containers work really well for this purpose.

I hope this gets you excited to start your own planting this year. Gardening doesn’t have to be anything major. You can start this year by just growing some tomatoes in pots and then add some more each year. Stay tuned and watch how my garden grows this year. Let me know how it goes!

Clever Throw Pillows

Clever Throw Pillows

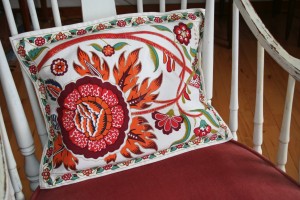
Over the last year I have continued to see and been enamored by throw pillows I’ve seen in home stores and magazines. Their beautifully patterned prints and various textured fabrics really make even the dullest of sofas really pop. I think of throw pillows like the special spice that really makes a recipe zing. They can just add so much.

My dilemma: I’m always attracted to the most expensive throw pillows. I like rich fabrics and expensive designer prints, but don’t have the budget to add them to my own living room.
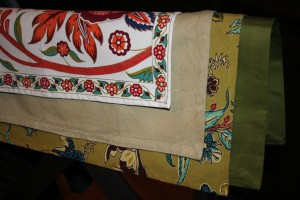
I kept thinking “why don’t I just buy some fabric and make my own throw pillows?” I searched around online for fabrics that caught my attention, but again I seemed to like the fabrics that cost upwards of $40/ yard or even more. Again, out of my budget…I’m really frugal and sometimes just cheap.

My solution: One day I was walking through World Market and saw they had a clearance section of cloth napkins and cloth placemats and the light bulb went off! I loved the fabrics and prints and they were already the size of throw pillows. There was a nice blend solids and prints that coordinated well. At $1 to $3 each I decided I had nothing to lose.

And my quest to turn these remnant cloth napkins and placemats into throw pillows began!

I wanted to make the throw pillow covers have a removable pillow insert so I could wash them. So, the only other thing I needed to buy was pillow stuffing and fabric for the insert pillows. I stopped by the craft store and a bag of pillow stuffing was anywhere from approximately $15 to $25. And I thought, yeah right…there has to be a cheaper way to make a pillow. And I found one. For $2 to $3 each I bought bed pillows from Walmart. Not only did I have my pillow stuffing, but also my cloth for the pillow inserts.

So, here’s how I made my throw pillows and how you can make yours as well!

In addition to the fabric (napkins or placemats) and cheap pillows to pull apart for the stuffing and fabric,
you’ll need a sewing machine, thread, pins, fabric scissors, and upholstery needle for your sewing machine (which I’d highly recommend using because when I used regular sized needles for my machine I broke 2 needles trying to make it work. Invest in the upholstery needles).
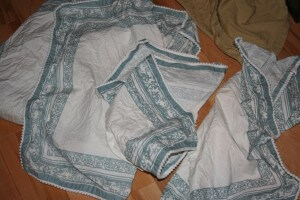
1. Wash the cloth napkins or cloth placemats first. This is really important as most of the fabrics will shrink a little and some more than others.

2. Find which fabric you want for the front of the pillow and which you want for the back. I suggest you use the napkin or placemat to its full size (don’t fold it down to fit the backing fabric). The backing fabric needs to be a little larger than the front fabric.

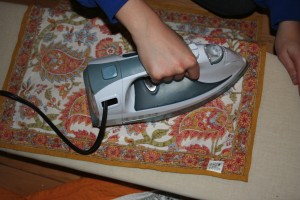
3. Iron both pieces of fabric (check the tags’ care directions first).
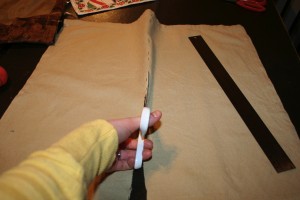
4. Using fabric scissors, cut the backing fabric in half where you want the opening for the pillow insert to be.
5. Pin back the un-hemmed edges you just cut and sew along those edges to finish them.
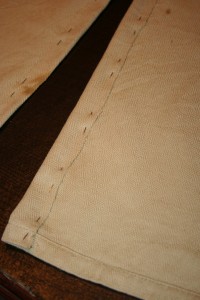
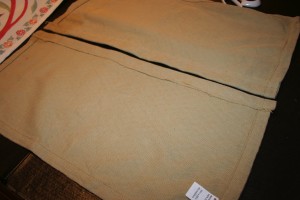
6. Line up outer edges of fabric, using the front fabric as a guide and starting in one corner. See photo below. Pin one of the short edges of the front and back face together, print sides out. And sew short sides of fabric together, on the inside of the fabrics edge.
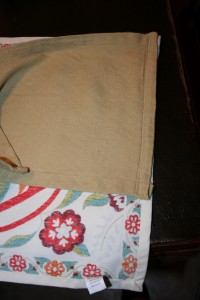
7. Pin the long side of both pieces of fabric together. Then fold under the backside fabric on the short end to align with the end of the front fabric, pulling taught, and pin along this edge. Sew along these edges on the inside of the finished edges of the fabrics. See photo below.
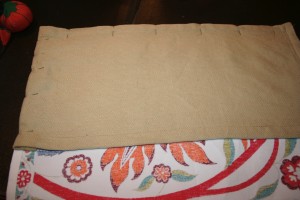
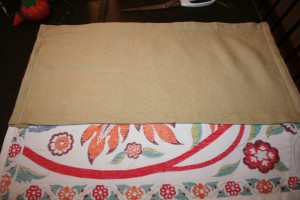
8. Repeat steps 6 and 7 with the other piece of backing fabric, overlapping the middle edges by at least 1 1/2″.
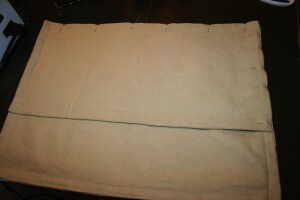
9. Create insert pillow by sewing two pieces of fabric together face sides in on three sides and half of the 4th side. Turn the fabric face side out. Stuff the pillow. The hand stitch the remaining opening.

10. Stuff the insert pillow into the pillow case and voila!
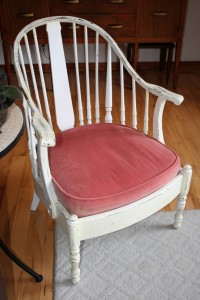
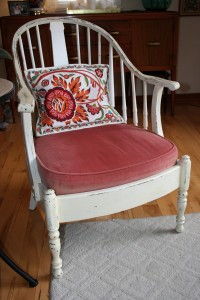
You’ve created a beautiful throw pillow that will turn a nice chair into a “Oh, what a cute chair”!